
Root Rot Rescue: The Complete Guide to Saving Your Drowning Houseplants

It is a warm, sunny Sunday. You are doing what every good plant parent does: giving your houseplants a proper check-in and a generous drink. You step back feeling accomplished. Everything looks hydrated and cheerful.
Fast forward a few days and something feels off. Several leaves are turning yellow. The stem looks soft. Another plant appears limp even though you watered it recently. The soil smells slightly sour. Tiny black flies hover when you move the pot.
If this sounds familiar, you are likely dealing with root rot.
Root rot is one of the most common houseplant problems we see. Usually, it begins with well-intentioned actions. Too much water, poor drainage or soil that stays wet for too long creates the perfect environment for roots to suffocate. When roots sit in oxygen-poor soil, bacteria and fungi multiply and begin to break down the root system.
The good news is that if you catch it early and correct the cause, you can often save your plant completely. In this guide, we will walk you through the signs of root rot, what causes it, how to fix it and how to prevent it from happening again.
Let’s get into it.

Common Symptoms of Root Rot in Houseplants
Signs above the Soil: What you will see first
These are often the easiest things to spot when checking what may be causing your plant to look a little less than happy.
-
Yellowing leaves
- This usually occurs within a few days and in abundance. Not just one or two leaves
-
Your plant is wilted, but the soil is wet
- You keep watering because the plant looks thirsty
-
Soft, droopy stems
- Some stems have gone a bit mushy and fall over
-
Leaves drop off easily
- Your plant keeps dropping leaves even though you have watered and the soil is wet
-
Fungus gnats around soil
- These are little black flies (fruit fly-like) that hover around the soil
- When watering these little flies swarm up from the soil
- See how to treat Fungus Gnats here
Below the Soil: What’s Happening at Root Level
If you think something is wrong within the soil, check your houseplant's roots.
To do this, gently squeeze your plant's grow pot to loosen up the soil. Then with a gentle but firm grip, slide your plant out of the nursery pot, disturbing the roots as little as possible, and look for the following signs:
- Roots that are brown or black
- Roots with a mushy, slimy texture
- A bad smell, usually sour, musty or like rotten vegetables
- Roots that fall apart when touched
Overwatered plants and those with consistently soggy potting soil often exhibit these symptoms. If you struggle to gauge when your plants need a drink, consider using clear plastic nursery pots. This will allow you to both see how wet the soil is and check on the health of your houseplants' roots.

What Causes Root Rot in Houseplants?
Now that we know root rot's symptoms, you may wonder what causes it. A few common causes, such as lack of drainage, are known; however, several other overlooked causes can be prevented.
Too frequent watering without checking soil moisture levels
Avoid dumping water on your plant simply because it is your watering day, the plant looks droopy, or the top layer of soil looks dry. It’s important to be discerning.
Watering on a schedule is the easiest way to overwater; it is always better to water only if you’ve checked the soil and confirmed that it is in need of water. The same can be said if you're just watering because the leaves are drooping; drooping leaves can also be caused by a lack of roots from root rot, presenting the same symptoms as underwatering. This is due to there being no way for your plant to draw up water. When the top layer of soil is dry and watering occurs, this can be a sneaky culprit, as water may still be present deeper in the pot, closer to the root ball. For more about how to water correctly, check out: Watering Plants 101: What to Consider.
Poor Drainage or No Drainage Holes
Often we find our favourite style or colour planter and think, "Wow, our plant will look stunning in this," but fail to notice there is no drainage. So, we think, 'Uh, it must be that way. I'll pop a few pebbles at the base and plant my plant directly; the pebbles will act as drainage.' Unfortunately, this is where it all went wrong. These planters are often designed to be a mess-free solution for decorative planters indoors and should just be used as a cover pot for the nursery pot your plant is already housed in. Lack of drainage means there is nowhere for the water to go, pooling at the base and eventually high enough to drown your plants' roots. The same can be said for using your planter correctly as a cover pot but never actually throwing out the water that builds up at the bottom.
This causes Anaerobic Soil: A condition where the water fills up all the gaps in the potting soil where oxygen is stored. When there is no oxygen left, it makes the ideal breeding ground for certain bacteria and fungi, which thrive in oxygenless spaces. They then cause your plant's roots to rot, eventually killing it off. Drainage not only helps prevent excess water pooling in the soil but also helps pull fresh oxygen into the soil, keeping the soil ecosystem in check.
Compact or Heavy Soil Mix
When repotting houseplants, if you do not check the kinds of potting soil your houseplants prefer or do not add any extra drainage additives like perlite, you may end up with a potting mix that compacts easily. Some soils are very moisture-retentive, such as peat-based potting mixes; this causes them to expand and hold onto moisture longer with little water actually draining out. This is fine for certain tropicals, but if you plant anything that is used to drier conditions, like succulents, this can lead to immediate root rot issues. When shopping for potting mixes, always check in with the staff on duty and consider adding bark and perlite to your soil to assist with drainage. See Repotting Houseplants: When & How for more information.
Pot too Large for the Plant
It is a common misconception that if you plant your small plant into a large pot, you are saving time and giving your plant a bigger space to grow larger. The trouble is: this is the worst thing you can do. Think of soil like a sponge; the bigger or more it is, the more water it will hold. The more water sitting around the root system, which may still be too small to draw up a lot of water, the more this could lead to root rot. Hence, always be mindful of the soil-to-root ratio.
Low Light
If your plant is sitting in a lower-lit space, it can take much longer for the soil to dry out. This tends to tie in with the next topic, temperature. The lower the light, the cooler the space, and the longer it takes soil to dry out. Consider the lighting conditions of the space and adjust your watering schedule based on how quickly the soil is able to dry out.
Cold Temperatures Slowing Evaporation
Seasonal changes directly affect how quickly your plant’s soil dries out. In cooler months, when temperatures drop and growth slows, soil remains wet for longer than it does during warmer seasons. Because of this, watering should be adjusted accordingly, always checking soil moisture first rather than following the same routine year-round.

Step-by-Step: How to Fix Root Rot in Houseplants
Now that we understand the main cause of root rot, let’s look at what to do if you suspect your plant is affected and how to repair any damage that may have occurred. Following these simple steps can help your plant recover and return to healthy growth.
Step 1: Remove the Plant from Its Grow Pot
- Gently loosen soil by squeezing the grow pot to bring it away from the sides. When working with a ceramic planter, sometimes firmly tapping the sides or gently inserting a spade down the edge of the soil can assist with loosening it.
- With a firm but gentle grip, gently slide your plant out of its planter.
- Shake off as much wet soil as possible.
Step 2: Inspect the Roots
- Healthy roots = firm and white or lightly tan in colours
- Rotten roots = dark, mushy and often smelly
Step 3: Trim Away Rotten Roots
- Use clean, sharp scissors
- Remove all soft or mushy sections
- Disinfect tools before and after
Step 4: Let Roots Dry
- Leave the plant out to air dry for up to 24 hours
- Be sure the roots are spread out and are getting good airflow
Step 5: Repot in Fresh, Well-Draining Soil
- Use fresh potting mix.
- Choose a pot with proper drainage and size it just 2 to 3 cm larger than the root system.
- This may mean downsizing the planter if the roots are significantly reduced
-
Consider your pot too; either plant it in a plastic nursery pot with good drainage and use a decorative planter as a cover, or plant directly into a terracotta pot with drainage.
Why Terracotta?
Terracotta is almost like a wonder material for houseplants. Because it is made from natural clay, it is porous and hydrophilic. This means it absorbs excess moisture from the soil, drawing it away from your plant’s roots. Its breathable structure also allows air exchange, helping prevent anaerobic soil conditions. Just make sure the terracotta is unglazed, both inside and out.

Step 6: Relocate your Plant
- If your houseplant isn't thriving in a bright indirect position or consistently takes a long time to dry out, it may be time to relocate it.
- Place it in a space where it will receive good light; soft morning sun is ideal, and good airflow.
Step 7: Adjust Your Watering Routine
- Only water when the soil is reaching dryness. However, this is plant dependent. Check out our A-Z Plant Library to make sure you know your plants' watering needs.
- Use the look, weigh, feel method:
-
Look: is it drooping, or are the ends dry? Underwatering. Are there yellowing leaves? Generally overwatering.
Be mindful, though, that yellowing can be part of your plant's natural cycle or caused by another symptom. - Weigh: Is it light (the soil has less water) or heavy (the soil is saturated with water)?
- Feel the soil, 4-6 cm deep. Is it wet or moist?
-
Look: is it drooping, or are the ends dry? Underwatering. Are there yellowing leaves? Generally overwatering.

When Is Repotting Practical?
When it comes to a houseplant that has been under some form of stress, it is not always a wise idea to repot it. Repotting in itself is very stressful for houseplants, which is why it is generally best reserved for strong, healthy plants. There are, however, rare occasions, such as with root rot, when it becomes absolutely necessary to give your plant a fresh new home and a chance to start over. Below are a few tips to help you decide whether repotting is necessary or not, and read up more on repotting here.
Repot Immediately If
- Soil smells bad
-
Most of the roots are mushy.
- If this is the case, a drastic reduction in the root system may necessitate downsizing your plant.
- The pot has no drainage
-
The plant keeps declining, despite less watering
- This may be because the soil is compacting or something else is happening in the soil

You May Not Need to Repot If
- Only a few leaves have yellowed
- Once you have stopped watering: The Soil dries normally
- The proportion of mushy roots is lower than the proportion of healthy roots
If you find that repotting is not necessary, consider the following adjustments to improve your plant’s conditions:
- Improve drainage
- Increase light exposure
- Reduce watering frequency
- Remove any standing water
Can a Plant Recover from Severe Root Rot?
If most roots are gone: The survival rate of your houseplant may drop significantly. If this is the case, we recommend also taking a few cuttings and propagating your plant. For more information on propagation read: 5 Easy Houseplants to Propagate
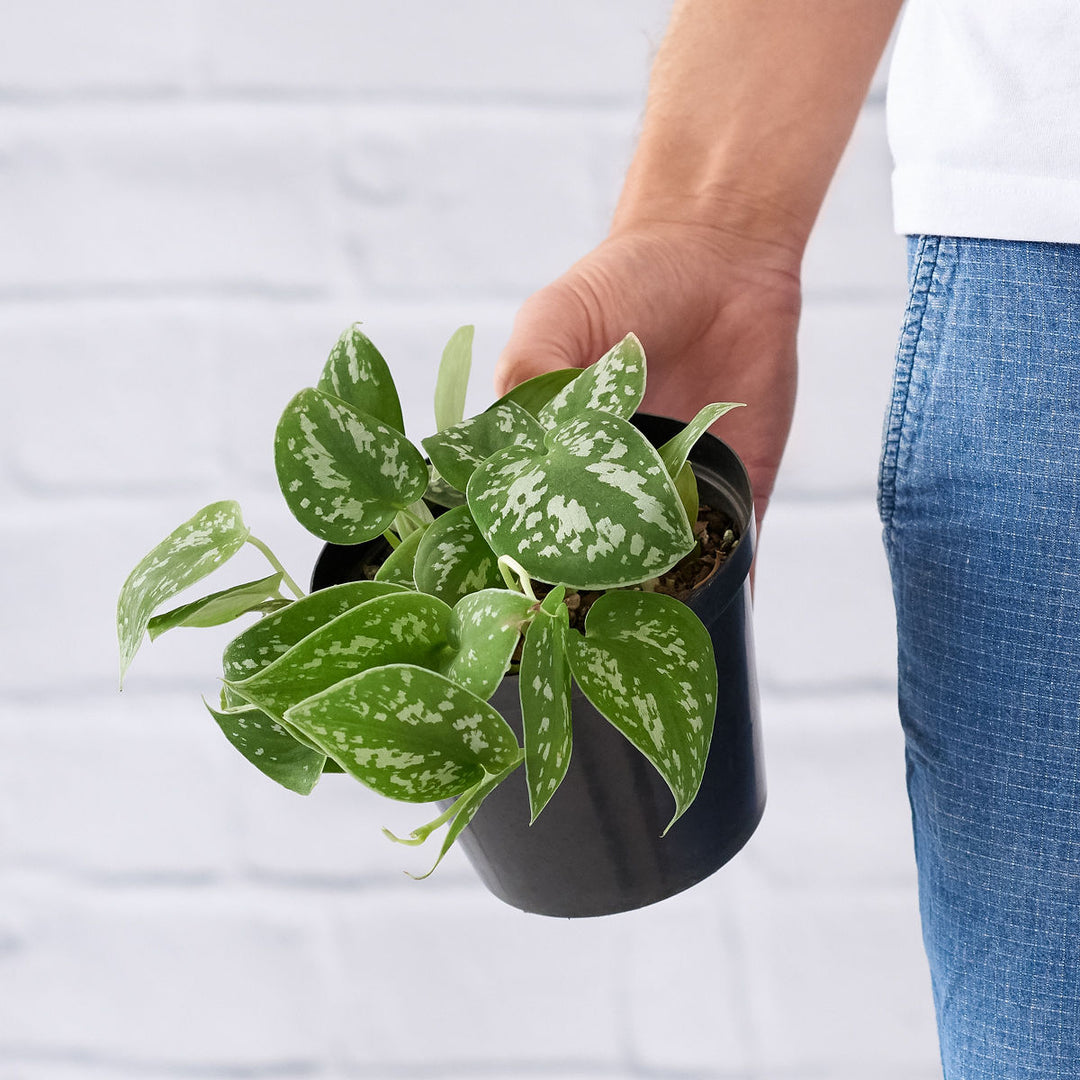
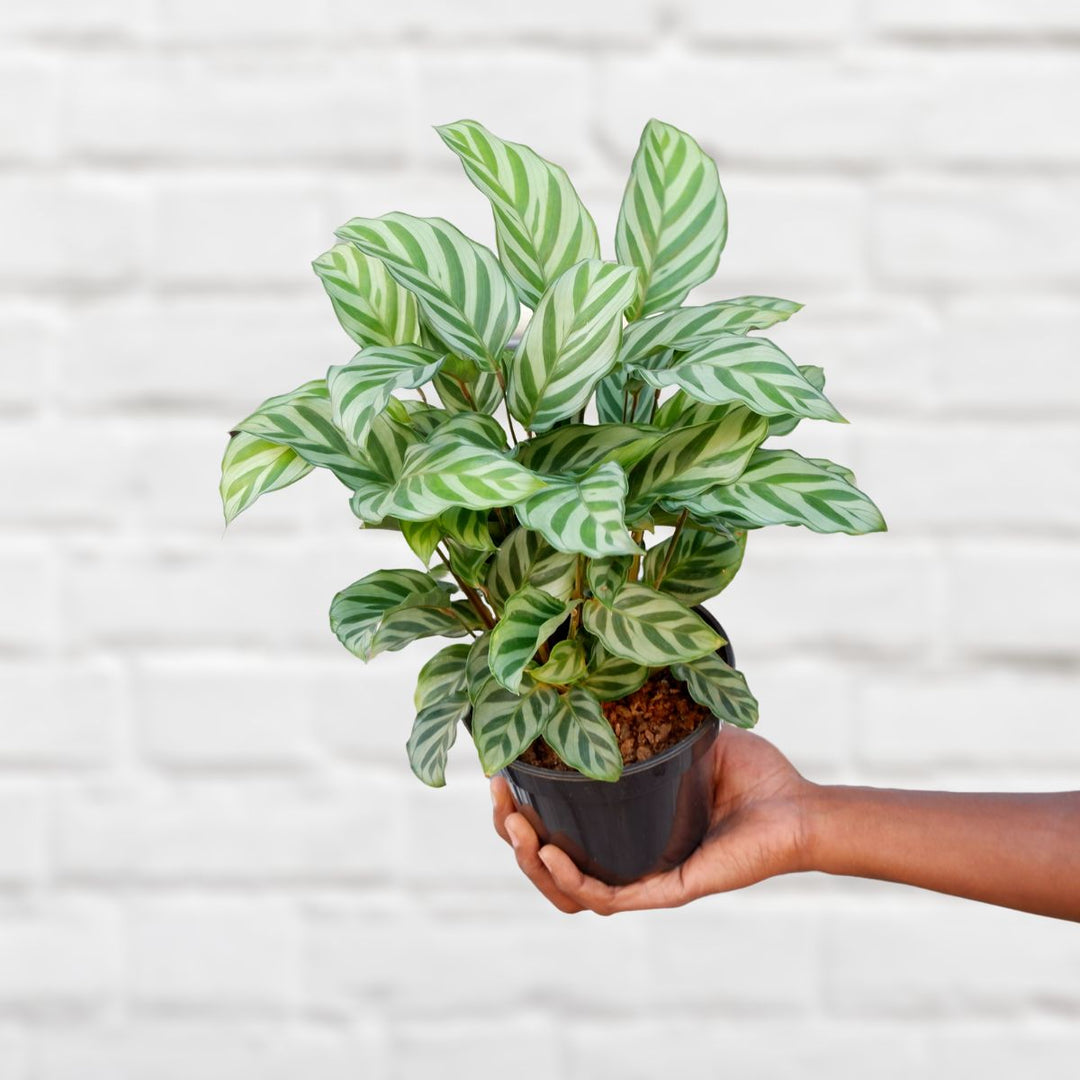
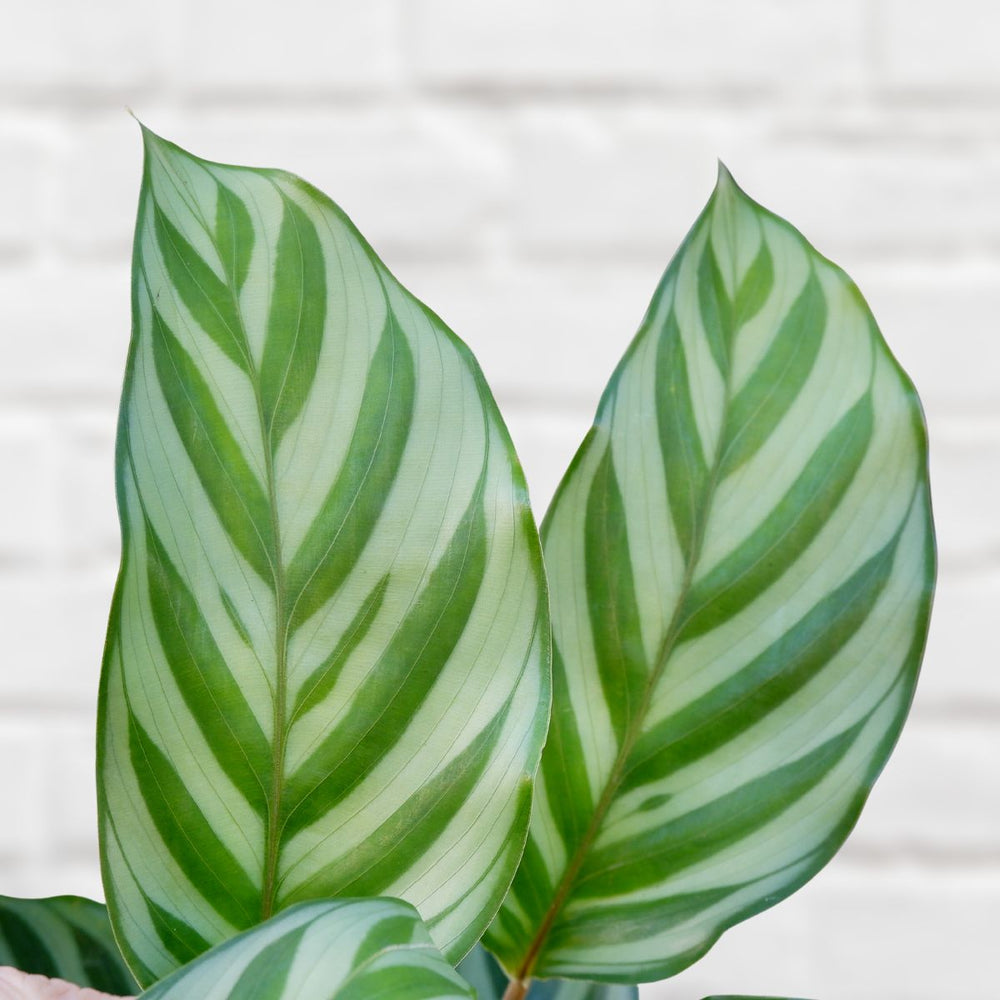
Some plants are a little more forgiving and have a higher chance of recovering from rot issues, such as Philodendrons, Pothos, Chinese evergreens, Monstera and, surprisingly, certain orchid varieties like the Moth Orchid. On the other hand, there are plants where severe stress and root disturbance can make survival more challenging. These include Ficus, Calathea and Peace Lilies, which are notoriously sensitive when their roots are damaged. Recovery is not impossible, but it does require patience and time.
Case Study: Real-life Example: Saving My Hoya from Root Rot
Before leaving for a six-week holiday overseas during a particularly hot summer, I asked a friend to look after my houseplants. Knowing Hoyas prefer to dry out between waterings, I left clear instructions: only water if the soil feels dry and the leaves are pliable, even if the weather is very hot.
Despite the instructions, my friend’s “good intentions” got the better of her. Worried that the pot full of a mix of hoyas might need more water during the heat, she watered it every time she visited; around twice a week. Unfortunately, the Hoya’s were sitting in a slightly lower-than-normal light spot, as I had slightly closed the blinds, just enough to hide the indoors while still letting some light in while I was away. Because of this, the soil never had a chance to dry properly between waterings, no matter the heat. Sadly I returned to a sad hoya and a few other plants. The Hoya bore the brunt of the damage.

Symptoms
When I returned home, it was clear something wasn’t quite right.
- Several leaves had begun turning yellow
- A few vines looked softer than usual or dry and dead
- Leaves had started to drop
- The potting soil smelled slightly sour
- Fungus gnats were hovering around the planter
After gently removing the plant from its pot, I found most Hoyas had started to die; only my Globulosa was hanging on. Several roots had turned brown, soft and mushy; clear signs of root rot.
Actions
To rescue the plant, I followed a simple recovery process:
- Removed the Hoya from its pot and gently loosened the wet soil
- Trimmed away the soft, rotting roots using clean scissors
- Left the root system out to air dry for several hours
- Repot the surviving plant into a fresh orchid mix (bark, perlite, and a little LECA I had left over). I prefer my hoya mixes to be airy.
- Planted it into a slightly smaller pot with proper drainage
- Moved it to a brighter position with good airflow
I also went back to my watering routine, allowing the mix to dry properly and the leaves to become pliable, between waterings.

Outcome
The recovery was very slow, as these plants are slow growers, but encouraging.
- Within a month, the yellowing stopped spreading.
- After about 2 months, a small new vine and leaf began to emerge
- By month 4, the plant had stabilised and resumed steady growth
The experience was a great reminder that even with clear instructions, overwatering is one of the easiest mistakes to make with houseplants—and that checking the soil is always more important than watering on a schedule or with “good intentions”.
Prevention Tips to Avoid Root Rot in Houseplants
We all know that prevention is better than cure. Being mindful of your watering habits, understanding your plant’s needs and recognising early signs of stress can help you avoid problems before they start. Below are a few practical ways to ensure root rot does not become an issue for your houseplants again.

Water Smarter
- Always check the soil moisture level before watering.
- Use a moisture meter if unsure: If you struggle gauging moisture, consider purchasing a moisture meter and using clear plastic nursery pots to keep an eye on root health as well as moisture levels deeper in your planter.
- Empty saucers after watering. We recommend doing your rounds and watering all your plants. Once completed, return to the first planter and check if any water has pooled at the bottom. The procedure usually takes a few minutes as the water permeates through the soil. If any has been collected, tip it out to avoid your plants' drainage holes sitting in water.

Improve Environmental Conditions
- Give adequate light: if you are finding that the position you have your plant in is preventing it from drying out in a reasonable amount of time, say within a week. Relocate.
- Avoid cold, dark corners, especially in naturally humid spaces like bathrooms, as these corners are notorious for lack of quality airflow, which will prevent the soil from drying out. This is often the best recipe for fungal and bacterial infections.
- Ensure airflow: Cracking a window can do wonders for your plants. Good airflow prevents the air from becoming stagnant, which creates conditions that encourage fungal growth, and it also helps your potting soil dry at a healthy, steady pace.

Use the Right Soil Mix
We encourage doing a little research for each of your houseplants to understand the soil mediums they prefer. It is always best to try to mimic your plants' natural habitat. Many tropicals like slightly moisture-retentive potting mixes that drain well. While succulents & cacti prefer a looser, more sandy medium. With this added drainage, like perlite, bark or even pumice, it can do more good than harm. We do recommend avoiding leca however, as this is clay and can draw moisture away from your plants roots if not enough moisture is in the soil.
-
Avoid dense, compact soil: This is easy to check. Most indoor plant nurseries sell potting mixes suitable for houseplants, and many traditional nurseries have open sample bags. Take a handful and gently squeeze it in your palm, then release. If it holds its shape in a tight clump, it is likely too dense. If it falls apart easily while still feeling slightly moist, it is ideal. Also check the ingredient list. Avoid mixes made primarily of peat moss or those containing river sand (unless you are potting a succulent). A better option is a blend of coco peat, worm castings and drainage additives like bark and perlite.

Choose the Right Pot Size
-
Don’t oversize pots: the rule of thumb is to always have just enough space to house the full root system with enough space for enough soil to cover and stabilise your plant in its pot, roots should fill 60–80% of pot. So your Planter should be no bigger than 3 to 5 cm bigger than the previous planter your plant was in.
Beginner Mistakes to Avoid
Here’s your Checklist for beginner mistakes to avoid to prevent root rot in houseplants:
-
Watering on autopilot. Plants do not follow calendars. Always check the soil first.
-
Assuming drooping leaves means your plant is thirsty. Drooping leaves can be a symptom of a variety of things. Such as lighting, disease and Pests.
-
Ignoring drainage holes: Always make sure your planter has drainage. If it doesn't, but you absolutely love it so much and know it will look fabulous with a plant in, rather use it as a cover pot and keep your plant in it’s plastic grow pot.
-
Reusing contaminated soil: This risk is often underestimated, but reusing soil can lead to issues like spreading disease and viruses. These issues can often hide in soil and bring down an otherwise very healthy plant.
-
Not cleaning tools: Another often overlooked cause of issues in houseplants. It is best to clean and sanitise your tools between each plant to avoid spreading any diseases between houseplants.
Frequently Asked Questions About Root Rot
How do I know if my plant has root rot?
Look for these common signs of root rot in houseplants:
- Yellowing leaves, especially lower ones
- Wilting even though the soil is wet
- Soft, drooping stems
- Soil that smells sour or rotten
- Fungus gnats hovering around the pot
- Brown, black, mushy roots when checked
If your plant looks thirsty but the soil is still damp, that’s one of the most common overwatered plant symptoms.
Can root rot spread to other plants?
Yes, it can.
Root rot pathogens, which are either fungal or bacterial organisms, can spread through:
- Reusing contaminated soil
- Sharing pots without cleaning them
- Using unsterilised pruning tools
- Water draining between pots in shared trays
Always disinfect tools and avoid reusing old soil from an infected plant.
Should I use Hydrogen Peroxide for Root Rot?
Hydrogen peroxide can help kill some surface bacteria and add oxygen to the soil temporarily. However:
- It’s not a guaranteed cure
- It won’t fix severely rotted roots
- It should never replace proper pruning and repotting
The most effective solution is trimming affected roots and repotting in fresh, well-draining soil.
How Long Does it Take a Plant to Recover From Root Rot?
- Recovery usually takes 2–6 weeks, depending on:
- How severe the root damage was
- How quickly you intervened
- The type of plant (some are more resilient than others)
You’ll know it’s improving when new growth appears and leaves stop yellowing. Patience and proper watering adjustments are key.

Root rot can feel dramatic. One minute, your plant looks lush and happy; the next, it's yellowing, drooping, and testing your confidence. But here’s the truth: it happens to almost every plant parent at some point.
The difference between losing a plant and saving one often comes down to slowing down and paying attention.
When you understand why root rot happens, how to spot the early signs, and how to adjust your watering and environment, you’re no longer guessing. You’re responding with intention.
Plants don’t need perfect care. They need mindful care.
So check the soil before you water. Choose the right pot. Give them light and airflow. And if something feels off, trust your instincts and investigate early.
You’ve got this.
And if you ever need guidance, we’re always here to help, online, in-store, or just a message away


Leave a comment