
Step-by-Step Guide to Houseplant Grafting

Trying to save a special plant or explore something new with your indoor jungle? Grafting might be just the technique that is worth learning for you.
This ancient and well-practiced horticultural technique has been around for thousands of years. Farmers originally developed it to grow stronger, more productive crops. Since then the technique has grown and developed into a valuable tool for extending a plant’s life, preserving rare or endangered specimens, and even reviving a weak plant by providing it with a stronger or more resilient root system. But it’s not just for commercial growers. Grafting has long been used in the art of Bonsai, where it allows Bonsai artists to shape miniature trees with precision and intent. And now, it’s increasingly being adopted by houseplant enthusiasts looking to move beyond basic propagation and experiment with more advanced techniques.
In this article, we’ll walk you through the essentials: the history of grafting, key terminology, and simple beginner techniques. You’ll also discover which houseplants are best suited for practicing your first graft – whether you’re growing your skills or trying to give a beloved plant a second chance.
Let’s get into it!
Background to Grafting
What is Grafting?
Grafting is a technique in which two plants – often different varieties and sometimes even different species – are joined together to grow as one. This is done by attaching a scion (the plant you would like to grow) to a rootstock (a healthy root system that will support growth and nutrient uptake).
To really appreciate grafting, it helps to understand where it all began—so let’s take a quick stroll through history and have a look at its origins.
The History of Grafting
Grafting has some pretty deep historical roots, stretching back thousands of years. One of the earliest documentations of this comes from ancient China, where plant cultivators during the Zhou Dynasty were already experimenting with grafting techniques to improve fruit tree production. By the 6th century CE, texts like the Qimin Yaoshu (an ancient Chinese agricultural encyclopaedia) described detailed methods for grafting pear twigs onto crab apple, jujube, and pomegranate rootstocks, as well as techniques for grafting persimmons. These early innovators recognised the true potential of attaching two plants together, with different desirable traits, to enhance the resilience and productivity of these fruit trees.
Fun Fact: The Qimin Yaoshu – which means “Essential Techniques for the Common People” - is one of the oldest agricultural encyclopaedias in the world! It covers everything from grafting fruit trees to pest control, showing just how advanced ancient Chinese farming was all those years ago.
Then came the Greeks and Romans, who used grafting techniques to improve their most important crops, such as olives, figs, and grapes. The Romans specifically were more interested in creating the productive orchards of apples, pears, and vines. They, in turn, perfected more advanced techniques, such as cleft and bark grafting (see more on these techniques below), and documented their knowledge in their own agricultural manuals, some of which are still referenced today.
In more recent times, the Victorians made true advancements in the plant world. During the 19th Century, grafting became especially popular among amateur botanists, who were plentiful. Their passion for collecting and experimenting led to widespread use of grafting, particularly with roses and fruit trees. They often used grafting to create new and unique hybrids, which we still see today, combining traits like colour, fragrance, and hardiness.

Beyond fruit, they also grafted various ornamental plants to satisfy their craving for exotic and resilient species that would survive in British gardens. A favourite was the camellia, where grafting onto hardy rootstocks helped produce stronger, more resistant plants with stunning new flower colours and shapes, making camellias a beloved fixture in Victorian gardens. This era of exotic curiosity helped lay the groundwork for many of the beloved garden plants we enjoy today.
Now that we’ve whizzed through history and seen just how ancient and developed this technique really is, let’s break down the key terms you’ll see popping up throughout this article. Think of this as your grafting cheat sheet.
Plant Grafting Glossary
- Scion: The top part of the plant, chosen for its desirable traits like beauty, blooms, leaves, or fruit.
- Rootstock: The bottom part, selected for its strong roots, disease resistance, or ability to control growth, e.g., size, like in bonsai.
-
Cambium: The thin, active layer just beneath the bark where all the plant growth happens – this is the layer that needs to line up for the graft to take.
An obvious visual example of this is when you gently scrape the bark of a twig and you can see the visible green layer below. -
Graft Union: This is where the scion and rootstock meet and (hopefully) fuse into one new plant.

8 Reasons to Graft Your Houseplants
Most likely, you've seen a variety of grafted plants without even realising it. This is especially true during a scenic drive through Stellenbosch's vineyards or during a wine tasting, where the topic is occasionally mentioned. Most vineyards use grafted vines: hardy American rootstocks that resist soil-borne pests like phylloxera (a root-destroying insect that destroyed vineyards in the 1800s), paired with classic European varieties like Cabernet or Shiraz. It’s a genius fix that saved the global wine industry.
But it’s not just for viticulturists (wine growers) or fruit farmers. Roses, citrus trees, and even some quirky houseplants, such as the prevalent Ficus Ginseng Bonsai, are often grafted. So… why graft at all? There are loads of reasons, especially if you’re feeling adventurous or trying to solve a plant problem that propagation hasn't fixed. Here are some of the main reasons grafting is used both by farmers and hobbyists:
To Enhance Growth and Vigour.
Sometimes a plant is a beauty but a bit of a diva when it comes to thriving on the very rootstock it produced; we all have a plant like that. By attaching it to a stronger, more vigorous rootstock, you can boost its overall health and growth. This dynamic duo grows faster, resists stress better, and can even handle those not always so ideal indoor conditions; you just have to make sure everything is compatible. It’s also a smart way to preserve rare or endangered species that might be struggling in their native habitats and soils due to various environmental changes or issues.

The Franklin Tree (Franklinia alatamaha) is a fascinating example of grafting’s power. This rare tree actually became extinct in the wild by the early 19th century but survives today thanks to early plant collectors (namely John & William Bartram) who grafted cuttings onto related rootstocks. Without grafting, the Franklin Tree might have been lost forever, making it a living tribute to the technique’s ability to save endangered plants.
Create Unique Plant Hybrids with Grafting
This is the exciting part. Grafting lets you create all kinds of Frankenstein-style combos: Imagine one plant with a bunch of different leaf shapes or colours, thanks to the different grafted branches. Grafting is an excellent option for collectors, creators, or hobbyists seeking to add their own unique plant creation to their plant shelf.

A wonderful example is the Tree of 40 Fruit, created by artist Sam Van Aken, who grafted over 40 varieties of stone fruits, including peaches, plums, and cherries, onto a single tree both to save rare species and to create a living piece of art. It blooms in a stunning patchwork of colours and fruits throughout the season, blending science, art, and conservation all in one.
Encourage Flowering or Fruiting
Got a plant that’s shy to bloom indoors? By grafting it onto a more mature or bloom-happy rootstock, you can gently encourage it to start showing off. This trick is especially handy for fruiting plants or ornamentals that refuse to strut their stuff unless all conditions are just right.
Save a Damaged or Declining Plant
Ever had a plant where the top is thriving but the roots have given? Or vice versa? Grafting can be a bit like plant organ donation. You rescue the healthy part by attaching it to a more stable base, giving it a second chance. Say your beloved Jade plant’s roots rotted from a bout of overwatering, but the top is still plump and green. Grafting that healthy piece onto another similarly strong rootstock could help save its life.
Improve Disease Resistance
Some rootstocks come with built-in resilience – these are often chosen for one or more of the following reasons: pest resistance, tolerance to poor soil, or immunity to common diseases. Another reason why wine-producing grapevines are grafted. By grafting your more delicate plant, which may not like the soil or conditions, onto a tougher, more tolerant base, you're giving it a much better shot at thriving long-term.
Control Size and Shape
Grafting is commonly used in the world of bonsai, but it's also useful if you like to keep a houseplant compact or shape it into something more sculptural and unique. Certain rootstocks naturally limit growth, making them ideal for bonsai artists and for indoor plant lovers who want to keep their greenery from overtaking the living room. Grafting gives you greater control over both the size and appearance of your plant.

Multiply Plants More Efficiently
Some plants can be finicky when it comes to propagation: cuttings fail, roots don’t form, and you’re left with stinky mush every time you try. Grafting can be a faster, more reliable way to clone certain plants with specific traits you love or prefer.
Experiment & Aesthetics
Grafting has a super fun side too! It can be a useful and fascinating plant trick to use in certain cases. Ever seen a Moon Cactus? That neon pink, orange, or yellow top isn’t just eye-catching; it actually can’t survive on its own because it has no chlorophyll to photosynthesise and make its own food. Therefore, growers graft the plant onto a variety of cactus that is green, which can provide the necessary chlorophyll to sustain the entire plant. Two entirely different species are fused to create one spectacular display. The same technique is often used for rare Euphorbias and crested succulents to showcase their unique forms. In bonsai art, grafting is used to create dramatic designs like floating roots or thoughtful branch placement, resulting in a living sculpture.
Does Grafting Really Benefit Houseplants?
The answer is both yes and no. Grafting is essential in big commercial settings such as orchards. For houseplants, it’s more of a passion project – perfect for serious plant nerds, plant rescue missions, or anyone curious about pushing the boundaries of what’s possible. While grafting isn’t necessary for most indoor growers, it can be hugely rewarding: visually, emotionally, and yes, it’ll definitely earn you some plant parent pride.
Four Different Types of Plant Grafting Techniques
As we now know, grafting is an age-old technique that has been around for centuries. Over time, different “styles” of grafting have been developed, some of which work better than others depending on the type of plant, the goal of the graft, and the growing conditions.
Most of the techniques we’ll look at fall under the umbrella of scion grafting. This is important to note because some people like to use this term for a variety of different techniques.
Below we will walk through four popular scion grafting techniques, explore when to use them, and highlight which kinds of plants they’re best used for. This should help you figure out which option works best for your grafting goals, whether you're experimenting with houseplants or diving into the very beginning stages of bonsai.

1. Splice Grafting
This is hands down one of the easiest grafting techniques out there. All you have to do is cut the scion at a slant, do the same for the rootstock, then line the two up and wrap them tightly. This method is especially handy for soft-stemmed or semi-woody plants with similar stem thicknesses – making it a fun option to experiment with on common houseplants like Philodendron or Pothos. While splice grafting isn’t typically used for these plants in horticultural settings, it can be a wonderful way to experiment with propagation and compatibility in a more explorative way for the everyday plant hobbyist.
Advantages of Splice Grafting
- Beginner Friendly: The cuts are simple and don’t require weird or technical cutting techniques or special tools.
- Fast results: Because the cuts are clean and there’s excellent contact between the scion and rootstock, the graft typically heals quickly. This advantage means your grafted plant can establish faster and mature sooner than with more complex methods.
- Space Saving: It doesn't require much room and is perfect for compact spaces.
- Efficient for propagation: It lets you grow new plants by attaching, say, multiple small pieces from your favourite plant onto an existing rooted stem or stems. This means you can make multiple plants without starting each one from seed or cutting. It’s a quick and simple way to multiply rare or slow-growing plants.
Limitations of Splice Grafting
- Timing is crucial: Splice grafting should be done just before plants come out of dormancy, usually in late winter or early spring, so they’re actively growing as the graft heals.
- Stem diameter must match: For the graft to take successfully, the scion and rootstock must be close enough in size to ensure proper cambial alignment.
- Not all plants are compatible: Always research compatibility first; just because two plants are from the same family doesn’t guarantee a successful graft, or if you have enough plant matter, experiment.
Plants commonly grafted with this technique Include: Tomatoes and peppers

2. Cleft Grafting
This is another beginner-friendly grafting option and is ideal for when your scion and rootstock do not match in size. A vertical split is made in the often thicker rootstock (usually a stump or branch), creating a cleft. The scion, usually a thinner shoot, is cut into a wedge (think arrowhead shape) and inserted into the split so that the cambium layers on at least one side line up; this is crucial for a successful graft. This method is popular in fruit tree grafting and is often used to revive older plants by attaching scions from older plants onto younger, healthier rootstock. It’s the perfect choice for extending the life of a sentimental plant.
Advantages of Cleft Grafting
- Beginner-friendly: Simple to do and doesn’t require fancy cuts or tools.
- Good for stem-size mismatch: excellent when the rootstock is significantly thicker than the scion.
- Works on older wood: Especially useful for reviving older or established plants.
Limitations to Consider for Cleft Grafting
- Stressful for the plant: The cleft can be a big wound, so aftercare is essential.
- Slower to heal: Compared to splice or whip-and-tongue, it takes much longer to seal up.
- Not ideal for soft-stemmed plants: It is better suited for woody or semi-woody stems.
Plants commonly grafted with this technique Include roses, camellias and citrus trees.

3. Whip-and-Tongue Grafting
This technique looks a lot like splice grafting but is a bit more technical. It creates a stronger, more secure graft with better chances of success. You start by making a slanted cut on both the scion and rootstock, just like with splicing. Then, you slice a small “tongue” into each piece so they can lock together like puzzle pieces. This method is often used for woody plants or trees because it creates excellent contact between the cambium layers; that’s the thin, growing layer just under the bark where the plant’s cells divide and grow. When these cambium layers line up and join well, the graft heals faster and becomes stronger.
Advantages of Whip-and-Tongue Grafting
- Very strong union: The tongue-in-groove fit adds stability and helps prevent slippage. Keeping everything more connected.
- Good cambial contact: More surface area contact and more secure unions, mean your graft has more chance of taking and being successful.
- Good for long-term growth: Because of the strong, stable connection, whip-and-tongue grafts tend to support healthy, vigorous growth over time, making them ideal for plants that will grow massive or live longer, e.g., trees.
Limitations to Whip-and-Tongue Grafting
- A bit “fiddly”: requires more precision than a simple splice graft, might take a few tries to get right.
- Not ideal for very soft stems: This technique works best with semi-woody or woody materials. Like Ficus and other woody-stemmed plants.
- Takes longer to heal than a splice: Because of the added ‘tongue’ it can take longer for the union to heal between the Scion and the rootstock. However, the trade-off is a stronger, more secure graft.
- Stem diameter must closely match: for the “tongues” to fit and lock securely, the scion and rootstock need to be nearly the same thickness. This can make finding suitable plant pairs a bit tricky, especially for beginners or when working with plants of varying sizes and stem thicknesses.
Plants commonly grafted with this technique include apple, pear, cherry, plum, and other stone fruit trees

4. T-Budding Grafting
This technique is very specialised and more for those of us who have been grafting for a little while now. Though, it is totally worth the attempt if performed successfully. It is especially used for outdoor plants, like roses, citrus, and fruit trees.
Unlike the other methods that use an entire stem or branch, T-Budding only uses a single growth bud or growth node from the plant you want to propagate. You do this by cutting a T-shape into the bark of your chosen rootstock. Then, a healthy bud (with a thin layer of bark and a sliver of wood or just the bud shield) is taken from the plant you want to graft. This bud is carefully slipped into the cut, beneath the bark ‘flaps’ and in contact with the cambium layer, then wrapped tightly to keep it in place.
The timing for this is critical: this technique only works when the rootstock is actively growing and the bark is "slipping". That means the outer bark easily lifts away from the stem, making space for the bud to slide in without any hitches. This usually happens in spring or early summer, depending on the plant and local climate.
Advantages of T-Budding Grafting
- Economical: You only need one bud per graft – useful when you have a limited amount of plant material for grafting.
- Clean and neat: Very little damage is done to the rootstock.
- Perfect for outdoor woody plants: ideal for budding trees or roses in the right season.
- Quick healing: Due to the minimal damage to the rootstock, if done at the correct time, this technique tends to heal relatively quickly, leading to faster maturity.
Limitations of T-Budding Grafting
- Season-sensitive: Can only be done when the bark is slipping, usually spring or late summer.
- Not for indoor plants: Not commonly used on houseplants.
- Requires a practised hand:The cuts are small but precise, practice makes perfect.
- This process can easily go wrong: if it is done when the bark isn't slipping or when the bud isn’t properly wrapped, the procedure can fail or take longer than expected.
Plants commonly grafted with this technique include: Apple, Pear, Cherry, Plum, and other fruit trees, as well as Roses and Magnolias.
Compatibility Check: Not All Plants Are BFFs
As we’ve mentioned, not every scion and rootstock will successfully grow together. For a graft to take, it’s necessary to think about how well your plant pairings match. Here are a few guidelines to keep in mind when choosing combinations:
-
Closer is better: Stick to plants in the same family or genus (think Ficus-on-Ficus, or Philodendron-on-Philodendron).
-
Match growth pace: a vigorous grower grafted onto a slower rootstock can quickly cause stress and failure.
-
Match stem types: woody with woody, soft with soft. This ensures the cambium layers align like puzzle pieces.
-
Play it safe first: if you’re experimenting, start with the same species (like grafting a Rubber Tree ‘Tineke’ onto a Green Rubber Tree) before moving on to more adventurous pairings.
- What not to do: Avoid grafting a thin, soft stem onto a thick, woody stem. Their tissues grow at very different rates, and the cambium layers won’t align well enough for the graft to heal.
Think of grafting as a kind of matchmaking: when the pair are compatible, they thrive together; when they’re not, the union is usually short-lived.
Commonly Grafted Houseplants
It’s easy to think grafting is just a farmer’s game, mainly used for boosting food production, especially for its proficiency in fruit farming. But you might be surprised to learn that grafting has a place in the indoor plant world too, just for different reasons. While it’s not super common (yet), grafting can really shine when it comes to improving a plant’s look, helping it survive, or just experimenting for fun. And yes, bonsai is probably the most well-known example of grafting being used in a decorative way, but it’s not the only one!
Let’s take a look at three common types of houseplants where grafting plays a role, either for aesthetics, survival or just for something funky to try.

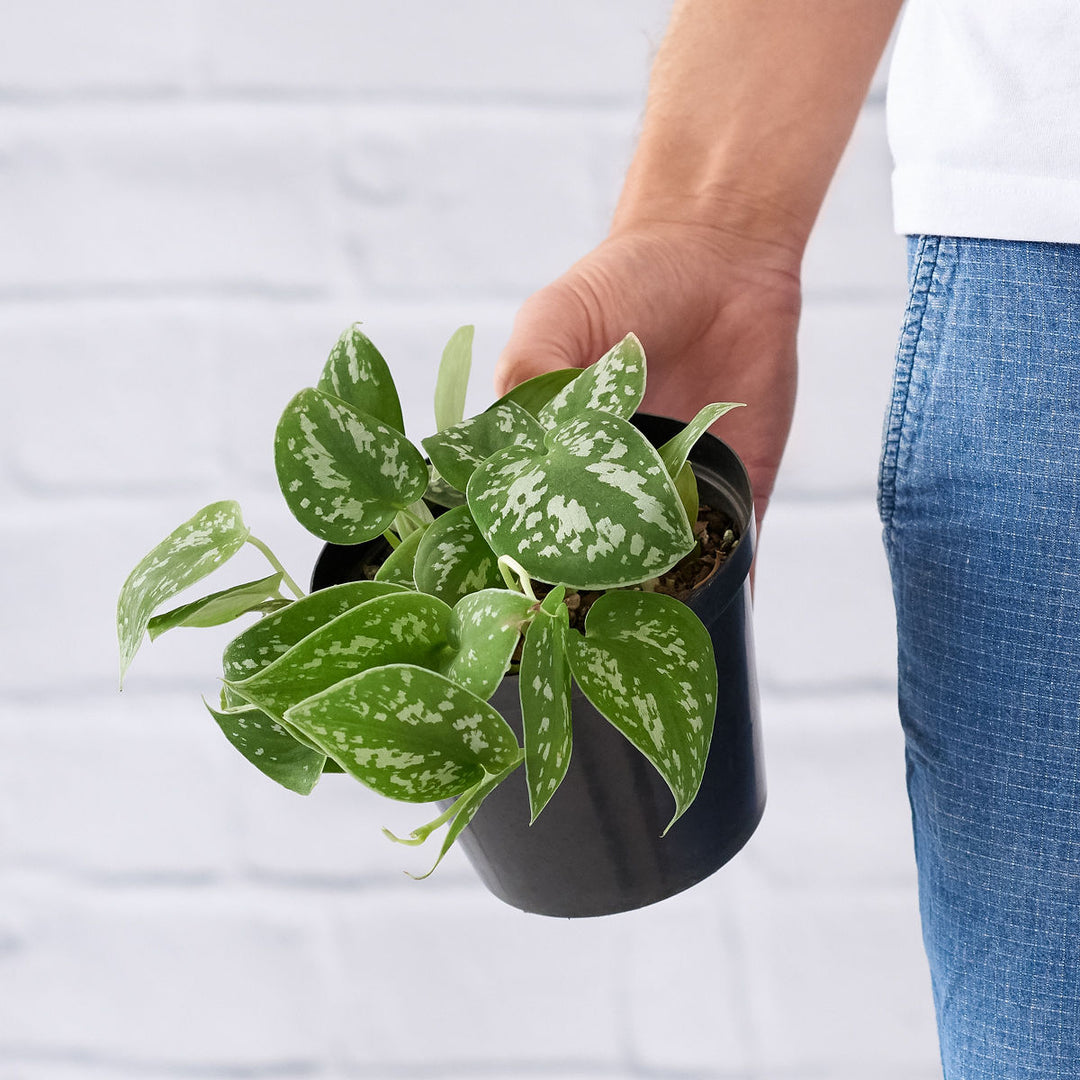
Cacti & Succulents
If you’ve ever popped into our stores, you’ve probably seen those bright, neon-coloured curiosities sitting on our shelves or near the front counter, called the Moon Cactus. Cute, right? They’re one of our most asked-about plants.
Fun fact: Moon Cacti wouldn’t survive without grafting. Those colourful tops (Gymnocalycium mihanovichii) don’t have the green tissue (chlorophyll) needed for photosynthesis, so they’re grafted onto a hardy green cactus base, usually Dragon Fruit (Hylocereus). It’s a perfect example of grafting being used for survival and something super cool to look at!
What’s important to understand is that even though the Moon Cactus (and many other varieties) are grafted onto other species, there’s little chance the base will ever mature or grow into its natural form.
This comes down to a few reasons, but the main one is this: in the case of the Moon Cactus, the grafted top doesn’t encourage the rootstock to grow like a regular Dragon Fruit would. It doesn’t produce enough energy to support that kind of growth. On top of that, the Dragon Fruit base becomes focused on sustaining the colourful top, which stunts its own natural growth. You may see it get a touch taller, but that’s all you will really get.
 Ultimately, Moon Cactus grafts are short-lived, usually only lasting a few years. Because the two parts grow at different rates, the graft will eventually weaken and decline. Though, if you find the top is still doing fine and the base is struggling, you can always regraft it onto a new base.
Other cacti and succulents that are commonly grafted include Crested Euphorbia lactea (i.e., Crested African Milk Trees), which has a coral-like form and is often grafted onto a straight Euphorbia base; Crested Myrtillocactus geometrizans (Crested Blue Flame), known for its sculptural, fan-shaped growth; and Monstrose Lophocereus schottii (Totem Pole Cactus), whose bubbly, tall shape benefits from the extra support of a graft. These are usually grafted to enhance their appearance, to prevent rot, or to help them grow more steadily, especially when their natural growth is unstable or too slow.

Aroids (like Philodendron & Monstera)
When it comes to aroids and grafting, this is definitely the trickier option. Aroid grafting isn’t super common (especially compared to what we see with cacti), but it does exist, and when it works, it’s both rewarding and seriously impressive. Especially because it’s usually done with those rarer, more sensitive plants on the market.
Aroids cover a huge family of leafy favourites, like Monstera, Philodendron, Anthurium, and Syngonium. You’ve probably had one that’s gotten pretty leggy, root-rotted, or is just plain stubborn. Grafting can be a great solution when the top of the plant is still healthy and beautiful, but the roots are failing, or when you want to give a sensitive species a more robust base to grow from.

Take Philodendron verrucosum, for example. It has amazing veined velvety leaves but is notoriously slow-growing and has a delicate root system. If its root system gives up, some growers will graft its top onto a stronger, faster-growing rootstock, like Philodendron sodiroi or Philodendron domesticum. That way, you keep the striking foliage of the amazing verrucosum while giving it a better foundation for survival and stability.
Grafting can also be a way to experiment, pairing compact growers with showy foliage or playing with structure. But that’s more in the realm of curiosity and collector experimentation.
To be realistic though, most Aroid grafts are done out of necessity, often to rescue a plant or give it a second shot after rot or root decline.
Important Consideration for Grafting Aroids
When it comes to aroid grafting, here are a few things to keep in mind:
- Compatibility matters. Even within the same genus (Philodendron, for example), not all species will successfully graft together. You’ll want to stick with species that share similar stem textures and growth rates. For example, you cannot try grafting a Heartleaf Philodendron to a Rojo Congo. To be clear, this is an outrageous example but worth getting the point across.
- Success rates can vary. Aroid stems are softer and hold more moisture than woody plants or cacti and succulents, so the risk of rot or failed connections is higher without careful technique and aftercare.
- Growth rates differ. Just like with Moon Cactus, mismatched growth between the top and bottom can lead to separation or decline over time. So be aware it’s not always forever, but it can still buy your plant a good few years.
That said, if you’ve ever found yourself staring at a lush top cutting with no roots and thought, “I wish I could save this” – then grafting might be just the thing. With patience, the right combo, and a little bit of trial and error, you may just deepen your skills as a grower and keep your favourite plant around just that much longer. So choose your pairings wisely!

Ficus Species, like Fiddle Leaf Fig, Rubber Tree & Ficus Ginseng
If you’ve ever had a Fiddle Leaf Fig or a Rubber Tree that started looking a bit leggy or sparse, you’re definitely not alone; this is a very common issue. Ficus plants are popular indoor favourites, but sometimes they need a little extra help to stay full and beautiful. That’s where grafting can come in.
Take the Ficus Ginseng for example, those chunky, bonsai-style plants with thick, bulbous stems and lush leafy tops. What you’re seeing there is a result of grafting. Growers take a sturdy rootstock that is likely to stay small and compact and graft a leafy, bushy top onto it to create an easy-care, sculptural mini tree that fits perfectly indoors.
 With Fiddle Leaf Figs and Rubber Trees, grafting is usually done to manage leggy growth or to rescue a plant struggling with its roots, because their root systems are quite sensitive.
Imagine you have a Fiddle Leaf Fig that’s stretched out, with a thin trunk and leaves only at the top. By grafting a healthy top cutting onto a stronger rootstock or lower trunk, you can encourage new growth and a bushier shape, which is, for most, the ultimate look. It’s like giving your plant a fresh start without losing the look you love. However, this isn’t a guaranteed way to restore full, iconic leaf coverage from bottom to top, like when you first bought your Fiddle Leaf Fig.
Grafting can sometimes help with leggy or sparse Fiddle Leaf Figs or Rubber Trees,, but it’s not usually the first choice just to get leaves back on the lower trunk. When you graft a new top onto a lower spot, it’s like hitting the reset button; it creates bushier new growth but doesn’t fix the original trunk. Usually, if the stem is still healthy, it’s better to improve light, watering, and feeding or prune to encourage new side shoots. That said, grafting ficus plants really shines in other ways. It’s often used to save plants with root problems or to create unique forms, like those charming Ficus Ginseng with their thick, intriguing trunks.
So, while grafting can help in some cases with Fiddle Leaf Figs, it’s mainly a technique for saving struggling plants or crafting unique shapes, not just filling in bare spots. Pruning and good care typically result in fuller growth, or you could try propagating new plants from cuttings.
For more information check out: Why is my Ficus Dropping It’s leaves: A Guide to Managing Leaf Loss.
Step-by-Step Guide to Grafting Houseplants
Now that we have looked at some commonly grafted plants, let's look at how to actually do some grafting ourselves. Grafting isn’t as technical as it may seem. With the right method, tools, and care, you’ll be well on your way to success. The trick lies in making clean, precise cuts, ensuring you align the cambium layers, and that you provide the ideal aftercare. Below is a simple, step-by-step guide to help you attempt your first graft with confidence, whether for reviving a beloved houseplant or creative experimenting.

Tools You'll Need to Graft Houseplants
- Gloves
- Sterilised Grafting Knife (any knife except one with a serrated edge will work; it must be sharp to make a clean cut) or a sharp razor blade.
- Parafilm or plant tape
- Rooting hormone (optional) – Be sure to select your rooting hormone according to the type of plant you are grafting, e.g., semi-hardwood, etc.
- Clear Plastic Bags or a Greenhouse - for Humidity.
Step 1: Select Your Scion & Rootstock
Be sure to select your plant as carefully as possible and do your research to ensure they are compatible. Only use healthy plant material:Your scion should be a fresh, disease-free cutting, and your rootstock should be well-established and strong.
Need some ideas? See our 4 beginner-friendly grafting plants below.
Step 2: Choose the Right Grafting Technique
Match the method to your plant’s size and stem type:
- Cleft graft: great for woody stems like Schefflera
- Splice or whip and tongue: ideal for soft stems like Philodendron.
- T-budding: best for plants with flexible bark.
Step 3: Prepare Your Workspace
Set up in a clean, firm environment, and make sure your cutting utensil is sharp. A cutting board may be beneficial for cutting and avoiding damage to your table.
Step 4: Make Clean, Precise Cuts
Cut the rootstock and scion based on your chosen technique. Ensure a clean, smooth cut and avoid crushing the plant tissue.
Step 5: Align Cambium Layers
This is critical:The cambium (the thin green ring under the bark) must make contact for the graft to take. Maximise contact as much as possible.
Step 6: Secure the Graft Firmly
Wrap the graft tightly with parafilm or plant tape to keep the joint stable and in place. This is also critical to prevent drying out.
Step 7: Create a Humid Environment
Cover with a clear bag or pop it into your greenhouse and place it in a warm, bright but indirect light spot to encourage growth.
Step 8: Monitor & Maintain
Care for your plant as usual, checking in on humidity levels, temperature and watering needs, and signs of decay regularly. Be sure to avoid overwatering and keep conditions warm and stable. Signs that your graft has taken should start taking place around 2 - 4 weeks, and this will be noticeable when the scion starts producing new growth.

Top Tip Recap for Grafting Popular Houseplants
- Some plants, like Ficus and Euphorbia release skin-irritating sap. Wear gloves and wash hands after handling.
- Remember to attempt grafting in spring or even early summer for the best results.
- Use clean, sharp tools (sterilised!)
- Align cambium layers; this is key for the graft to “take”.
- Wrap tightly with grafting tape or Parafilm to avoid drying out, and to ensure the graft is secure.
- Keep humidity high and light bright and indirect until healed.
-
Don’t overwater while healing; focus on stable conditions.
4 Beginner Houseplants Perfect for Grafting
Now that you know what grafting is, how it works, and how to do it, it’s time to put that knowledge to use. Below are four common, relatively inexpensive houseplants that are great for practising your technique and building confidence. Ready to give it a try? Start with one of these:

1. Umbrella Plants (Schefflera)
Umbrella Plants are undeniably the perfect beginner indoor plant, loved for their bushy appeal and striking palmate foliage. Adding that quintessential tropical vibe to any indoor space. Lucky for us, this resilient houseplant makes a fabulous candidate for grafting.
Commercially, growers often graft Shefflera to create their iconic bushy look. They either attach multiple stems to a strong rootstock or graft stems onto bare branches to create a sense of symmetry and fullness. As Umbrella Plants are known to stretch out and look a little leggy.
If you are struggling with a leggy or even unwell Umbrella Plant, and have been sure to relocate it to a brighter position, we suggest giving grafting a try to restore your plant's youthful appearance. You can do this by using the cleft grafting technique and trimming back some fresh bushy foliage to attach lower down.
Just ensure the stems you choose are the same width as the grafting spot. With Schefflera, you want to be sure the cambium layers are well aligned to encourage a successful graft.
Once you have completed your graft, make sure the position you choose to grow your grafted plant in has high humidity. Umbrella plants need this both to keep looking fabulous and to ensure your graft takes.

2. Philodendron Family (Aroids)
Philodendrons are among the most diverse and beloved houseplants, offering everything from trailing vines to full, bushy growers. With countless species to choose from, their popularity stems from a combination of low-maintenance care, impressive variety, and a broad range of colours and leaf shapes. It’s no surprise they’ve become essentials in any indoor plant collection.
Philodendrons are not often grafted commercially, but when grafting does occur, it’s usually to save a weak or dying plant and, on some occasions, to form a more compact grower. With that in mind, we thought it would be a valuable addition for you, our readers, especially for those wanting to rescue a prized or sentimental Philodendron, perhaps suffering from root rot.
If you’re considering attaching your Philodendron to a different variety, be sure to do your research first. However, we recommend finding the same species with a strong, healthy rootstock. This step can be a bit more challenging with rarer varieties, but it will increase your chances of success.
When it comes to the best grafting technique for Philodendron, splice grafting is the most effective, as Philodendron are considered softwood specimens. If you’re working with thicker stems – this also applies to mature Monsteras – a cleft graft can work well too. Just make sure the cambium layers are snug and properly aligned.
As Philodendrons are tropical by nature, maintaining warmth and high humidity is key to encouraging strong, healthy growth. If you’re grafting a vining variety, try securing it to a moss pole – this can promote faster, lusher growth.

3. Rubber Tree (Ficus Elastica)
The Rubber Tree is a fabulous specimen for a variety of grafting projects, from shaping to create a funky form to maintaining variegated specimens like a loved Tineke or Ruby.
Rubber Trees in general are one of the most popular indoor trees available on the market, and this has a lot to do with their ease of care compared to other Ficus species, as well as a wide variety of colour forms. The most striking is definitely the Tineke, which stands out for its stunning variegated foliage, often featuring swirls of creamy white, mint, and blush-pink tones.
The Rubber Tree will definitely be a wonderful option to experiment on. If you have a rather bare-looking Ficus Elastica, consider shaping it! You can do this by introducing new shoots and branches in selected spots on the stem, using the whip and tongue method. This will give you control over how your Rubber Tree will look, especially if you would like to create a more structured or balanced Tree, or even a multi-stemmed bushier plant.
It is also a wonderful way to save a Tineke, which can often be weaker than other greener options. So if you have a skinny, slow-growing Ficus Tineke, maybe consider grafting it onto a more robust rootstock from a Ficus Robusta, the every day Green Rubber Tree. This will help maintain the variegation in your Tineke, giving it a strong, healthy base to grow from. The Cleft Graft method will be ideal for this, helping you match up the cambium layer from a thinner Tineke onto the thicker, more robust stem of a Robusta.
Finally, something a little more exciting to consider: let’s say you love Rubber Trees so much that you have a few varieties knocking about. Why not try creating your own multi-tree to form a Rainbow Rubber Tree? You could take cuttings from different varieties, consider the placement and graft these onto a Robusta. Imagine that: a rare Rubber Tree with a variety of leaf colours dotted around. This would be the perfect experiment for someone looking to create a one-of-a-kind houseplant.
Just remember, the Rubber Tree has a white sticky latex that can cause skin irritation. So be sure to wear gloves when experimenting.

4. African Milk Tree (Euphorbia Trigona)
If there’s one succulent every collection should include, it’s the African Milk Tree. Hardy and low-maintenance, this Euphorbia thrives in a wide range of conditions; just don’t leave it in the dark. What truly sets it apart is its striking architectural structure: tall, elegant patterned stems with ridged edges and small leaves. It comes in several beautiful colour variations too, from the deep burgundy hues of the Rubra to the white, sculptural form of the Ghost Cactus.
When it comes to grafting, the African Milk Tree is an excellent candidate. It’s ideal for reshaping or saving a damaged plant. If your African Milk Tree is looking too upright and you'd like to encourage more branching, try attaching a few stems, from either another plant or one branch cut into chunks, at different points along the main stem. Grafting can also help rescue a rotting plant; just cut away the damaged parts and graft the healthy sections back onto the base.
For something a bit more creative to add to your collection, try grafting a crested form of Euphorbia yourself onto your African Milk Tree for a funky-looking specimen. Euphorbias are among the easiest succulents to graft thanks to their clearly visible vascular rings and fast response to clean cuts. Just be sure to wear gloves when working with them; their milky sap is a skin irritant.
Vascular rings in Euphorbia vs. Cambium layers in other plants:
Most plants have a continuous cambium layer, a thin ring of tissue that must align during grafting to allow the plant parts to fuse and grow. Euphorbia, however, has vascular rings instead: small, scattered circles of vascular tissue within the stem. Because these aren’t in a single layer, successful grafting depends on carefully aligning the vascular rings between the scion and rootstock.
Ready to Graft?
We hope this article has shown you that grafting is easier than you might have thought, or perhaps you’ve learnt something new and exciting and are now eager to try out these techniques yourself. Whether you want to save a plant, preserve a beloved specimen, or create something entirely new and fun, grafting is a fantastic next step in cultivating the ultimate indoor landscape.
We’d love to hear about any grafted plants you’ve experimented with or bonsai you’re proud of. Share your creations with us; we’re always inspired by the amazing things people achieve with plants!


Wow what an imformative article.!I have learnt alot and can’t wait to experiment!
Leave a comment