
Expert Plant Care Guide: How to Grow Thriving Peace Lilies

There are few houseplants that have won hearts over quite like the Peace Lily has. With its deep glossy green leaves, graceful white flowers, and resilient nature, it’s no wonder we believe the Peace lily is the ultimate indoor plant. In our opinion, no home or office space is truly complete without one - wherever you are in the world.
Beyond its elegance, the Peace lily carries rich symbolism - often representing peace, renewal, and harmony. This combination of beauty and meaning makes it the ideal choice for those considering both peace and aesthetics in the home.
Add to that its tolerance for low light, its unique way of “communicating” when it’s thirsty, its air-purifying superpowers, and its ability to live for a very long time. Making it the ultimate must-have houseplant.
For centuries, people have loved Peace Lilies for their striking good looks, calming energy, and wonderfully easy care. But while they’re generally fuss-free, a few top tips can take your plant from simply surviving to absolutely thriving.
In this guide, we’ll share everything you need to know, from the basic plant care to expert hacks, so you can enjoy your Peace lily for many years to come and maybe even pass it down a generation or two.
But before Peace lilies became the go-to plant for modern homes, they had a fascinating story of discovery and symbolism that stretches back centuries…

History & Origins
Peace lilies, scientifically known as Spathiphyllum, are native to the dense, warm tropics of Central and South America, including parts of Mexico, the Caribbean, and Southeast Asia. They thrive in the warm, humid undergrowth of jungles, particularly in Venezuela and Colombia, where they are most commonly found.
The first discovered Peace Lily was Spathiphyllum Wallisii, today's most popular variety, discovered by Gustav Wallis, a German plant collector, exploring Colombia in 1820. It was subsequently named in his honour.

The species, however, was formally described by Austrian botanist Heinrich Wilhelm Schott, a pioneering figure in plant taxonomy during the early 19th century. He derived the name from the Greek words “Spathe”, meaning “spoon” or “sheath”, and “Phyllon”, meaning “leaf”. This refers to the modified white leaf, which most people think of as the flower, which protects the actual flower spike (spadix). While the common name “Peace lily” comes from the fact that this spathe resembles a white flag, which is the universal symbol for peace and truce.

Early Cultivation of the Peace Lily
The Peace Lily found its way to Europe around 1870 from its native habitat but really only gained popularity during the 20th century for its ability to thrive in low light, ideal for most indoor situations.
There are an estimated 50 to 60 species of Spathiphyllum discovered and classified. In the 1980s, German growers began hybridising the Spathiphyllum varieties, giving rise to a wide range of cultivars. Many of these are still popular in today’s indoor plant trade, especially the large-leafed types such as ‘Sensation’ and ‘Mauna Loa.’
Though their popularity really soared during the 90s after NASAS study in 1990 about the incredible air-purifying properties.
FUN FACT: Commercial growers often use a plant hormone called gibberellic acid to induce year-round blooming in Peace Lilies, allowing the plant to be sold in bloom.

Peace Lily Traits and Varieties
Peace Lilies are impressive plants that come in a variety of sizes and styles, making them a wonderfully versatile houseplant. Smaller cultivars have been created to stay compact, ideal for small spaces such as your office desk or a tight shelf, while larger-leafed giants like the ‘Sensation’ can reach over a metre tall, the perfect statement piece. Leaf textures and colours can also vary, with some varieties being smooth or highly ribbed, while colours can range from white variegations to yellow.
Despite these differences, all Peace Lilies have the same needs, and with the right care they can thrive for many years and flower repeatedly and look beautiful doing it.
Let’s look at a couple of popular options…
Popular Varieties You’ll Find at Plantify

Peace Lily Wallisii: The classic and most common Peace Lily. It is a compact glossy-leafed plant, with arching leaves and delicate white blooms. Perfect for beginners and small spaces.

Peace Lily Sebastian: It's probably one of our absolute favourites. It stands tall and upright on long, thin stems with broad, paddle-like leaves. It stays relatively compact while growing tall. Adds a sophisticated elegance to compact spaces that can handle height without taking up too much space.

Peace Lily Chopin: Is an elegant medium-sized variety that blooms abundantly. The ideal option for you if you’re looking for a full-foliaged plant that has a lot of interest without getting too large.

Peace Lily Sensation: This is the largest cultivar available. It has large broad foliage that really makes a statement. They can grow to over a metre tall. Definitely the ultimate statement Peace lily.

Peace Lily Sensation Variegated: A rare twist on the classic Sensation, with striking white streaking throughout the large foliage. Creating a truly special variety. This variety will need more light than a standard green option but is worth it for its astounding beauty.

Peace Lily Diamond: Another striking variegated cultivar of the classic Peace Lily, this variety stands out with leaves marked by bold patches or delicate streaks of white. Each one is different, creating the effect of painted foliage. This variety still stays relatively compact without taking up too much space. This plant is ideal for adding a unique touch to a desk or a small shelf.

Peace Lily Caledora: A striking variety known for its large, lush, deeply veined leaves. Its impressive foliage creates a bold, tropical look, making it perfect for adding rich greenery and texture to larger indoor spaces.
Rare & Collector Peace Lilies

Peace Lily Picasso: As the name suggests, a true collector's piece. This is definitely one of the more striking variegated Peace lilies, with bold brushstrokes of white and green across every leaf.

Peace Lily Domino: This is a beautifully speckled-leafed variety, with the occasional splash of variegation similar to the Diamond but more subtle than the Picasso. They are a popular choice for people getting into collecting variegated Peace lilies. Making a fabulous addition to any space bright enough to maintain their patterning.

Peace Lily Silver Streak: If you first had to see this without it’s flowers, you would be convinced this is not a Peace lily. This variety features a clean white stripe down the centre of each deeop green leaf. Creating a sleek architectural look, making it perfect for a more modern interior.

Peace Lily Jessica: This cultivar is sometimes marketed as the Variegated Sensation. Though just like the streaked Sensation, the Jessica is a variegated option with creamy-yellow tones that blend gently into green leaves. It is less dramatic than the bold white types but prized for its warm, painterly effect.

Peace Lily Starlight: Created to flower abundantly indoors, this fabulous option is a fantastically rewarding option. It produces multiple blooms at once and has narrower foliage than the typical everyday Peace Liles.
Tropical Longevity
Peace Lilies are not just beautiful; they’re also remarkably resilient houseplants. With the right care, they can thrive for many years; we even know of a Peace Lily that has been happily growing for almost 25 years; her name is Audrey. Their longevity comes from their ability to continually produce new leaves and blooms from their base, allowing the plant to renew itself over time. Mature plants can also be divided. This is a fantastic way to create new, healthy specimens without losing the original, making them wonderful plants to share or pass down through generations.
Toxicity & Allergies
Peace lilies are perfectly safe to grow indoors and are unlikely to cause harm unless ingested by a curious or hungry little mouth. So, it is best that you keep them out of reach of pets and small children.
On the plus side, they are fabulous plants for those who love flowers but get a little allergic. Peace Lilies have a sticky pollen that is unlikely to become airborne and cause allergies.
Looking for more Allergy Safe plants, read on here: 8 Indoor Plants that are Allergy Safe, or Shop Pet friendly Plants here.

How to Care for Peace Lilies
For many Peace lilies can be a bit of an enigma, especially if their leaves droop as they are known to do. This leads many to think they are thirsty, as this is their general signal that they need a drink. However, this is often where many people go wrong, as too much water or too little light can cause the same symptoms. So in this guide we will teach you the simple ‘language’ of a Peace lily and how to care for it just right.

The Perfect Lighting for a Peace Lily
We often tout the Peace Lily as low-light tolerant. When we talk about tolerance, we mean that your plant will grow and survive, but it may not thrive. As we know Peace lilies grow on the canopy floor of dense jungles; however, they often strategically grow where the light is relatively dappled, preferring a more bright, indirect light position. So to keep your Peace lily healthy and happy, we always recommend a spot near a bright window; east is usually best, with possibly a sheer curtain to diffuse the light and keep it from being too harsh.
Signs Your Peace Lily is Not Getting Enough Light:
These are a few signs your Peace lily may be getting insufficient lighting:
- Small, spindly leaves: If you notice that over time, since you bought your Peace lily, that the leaves are developing a little smaller than the originals, this is a likely sign that your Peace Lily is not receiving enough light. If this is the case, we recommend relocating your plant to a bright position. However, avoid making any sudden changes too quickly, as this can lead to severe drooping. It is best to gradually move your plant to a brighter position over time, either by changing the position weekly from one lighting situation to another until you have found the perfect spot. It will take a few weeks to a couple of months for your plant to settle in, but once it has, you will most likely notice prolific growth.
-
Leggy growth: You are likely to see leggy growth if your leaves are small. You may even notice your plant stretching to one side. This happens because your Peace Lily is stretching for the light it needs. Unfortunately, once this has occurred, it is irreversible. Though moving the plant to a bright position in time will allow it to grow out fuller and less stretched.
TOP TIP: It is also good practice to rotate your plants periodically to avoid it growing to one side.
- Pale leaves: Leaves that appear paler can be a sign that your plant is not receiving enough light to photosynthesise. So check in on your plant's position and the amount of light it is receiving. If your plant is receiving enough light, see other lighting issues and watering below.
-
No or few blooms: This is one of the most common signs your Peace Lily isn't receiving enough light. They need, like most flowering plants, adequate bright light to develop their characteristic white blooms. It is important to check the season and variety; however, if it has been quite a few months or years, then relocate to a brighter spot to see if any changes take place. Other causes could be nutrients. See Feeding below.
-
Blooms that do occur turn green: If your plant is still producing flowers, but they are turning green quickly, then it is likely they are trying to optimise the light they are receiving. Peace lilies do this by producing chlorophyll in the modified spathe, instead of staying white. This is a good indicator that the light is just not bright enough to keep your plant happy and producing the beautifully plain white flowers. Relocate to a spot that is slightly brighter.

Signs your Peace Lily is Receiving Too Much Light:
- Curled leaves: Your leaves will curl from prolonged exposure to intense light. This is your Peace lilies way of trying to minimise its leaf surface’s exposure to very bright light. If your plant is receiving too much light or direct sunlight during parts of the day, we recommend relocating to a less exposed area.
- Brown, scorched spots: This symptom is caused by direct exposure to sunlight, leaving crispy dry patches on the leaves. Be sure to not place your Peace Lily on a windowsill or near a window where light comes directly through, especially within 30 cm. Windows can act as magnifying glasses, directing and intensifying sunlight. If this is the case, either cover the window with a sheer curtain to diffuse the light or move your plant just of of the direct rays of sunlight.
- Crispy leaf edges: Leaves that are consistently crisping can be a sign that they are losing water too quickly. With crisping edges, you may notice the plant drooping frequently. This is a sign that the space may be very bright, causing water to evaporate too quickly from the leaves. Relocate to a less bright and warm position to improve this.
-
Faded or bleached leaves: When your Peace Lily receives too much light, its leaves can start to look washed out or bleached rather than deep green. The plant may appear weak and lack its usual lush, healthy, deep green leaves, as the excess light causes the foliage to lose colour and vitality. If this is the case, relocate gradually from an excessively bright position.
- Stunted Growth: Exposing your plant to excessive light over time can hinder its overall growth. This then leads to weak, slowed growth or eventually completely stunted plants.

How to Water a Peace Lily
Peace lilies like it lightly moist, consistently. We like to compare the soil moisture to a lightly damp cloth that you have wrung out. The key here is balance, as an overly wet or soggy potting mix can lead to a variety of issues, namely root rot and excessive yellowing foliage. While overly dry potting mix leads to a droopy, sad-looking plant with crisp leaves and root loss.
When it comes to watering a Peace lily, we recommend checking in weekly, but this does not necessarily mean you have to water. As seasons will affect water evaporation. In warmer months you may find that your plant needs more frequent check-ins than in cooler months.
Before watering, we suggest checking the soil by sticking your finger into it until it is about 2–3 cm deep. If it feels dry, it is time to water. Another great method is to feel the pot by weight. If it is light, it needs a drink; if it is heavy, there is likely enough water to sustain it.
There are also a few physical signs to keep an eye out for. Peace lilies have the ability to tell you when they are thirsty with their leaves; it is just a matter of understanding their subtle language. A slight droop in the leaves is the plant’s way of telling you it needs water. However, don’t wait until the leaves are fully limp - that repeated stress can weaken the plant over time.
Best Watering Practices for Peace lilies
-
Even moisture: Be sure to saturate the whole potting mix as evenly as possible. This is best achieved by placing your plant in a bucket or sink where the water reaches halfway up the container. Watering from above and allowing the plant to stand in the water for about 10 to 15 minutes. Remove it from the its water basin and allow to drain thoroughly before placing it back in its drip tray or decorative pot. Check in after 5 minutes to pour out any excess moisture that may have still drained out.
-
Avoid waterlogging: Always ensure the pot has drainage holes and never leave the plant standing in water. This step is important to avoid root rot.
-
Good water quality: Peace Lilies can be sensitive to chlorine, fluoride, and hard water. If you live in an area that generally has high mineral content in the tap water. Use filtered or rainwater when possible, or let your tap water stand for around 24 hours before using to allow chemicals to dissipate.
Overwatering vs. Underwatering in Peace Lilies
There are a few signs you can keep an eye out for to avoid or fix over- or under-watering before it's too late. Overall, prevention is better than cure, though mistakes happen. Watering issues may be the cause of any symptoms you notice.
Signs of Overwatering
- Blackening of foliage from the tips onwards: This is a common and very clear sign root rot has likely started to set in.
- Yellowing leaves starting from the lower part of the plant. Be mindful, though, that sometimes this is caused by the natural lifecycle of the plant. If yellowing is excessive, then watering is likely the issue. If yellowing is infrequent and happens occasionally, it is most likely your plant's natural shedding of old foliage.
- Mushy stems or roots.
- The soil is constantly wet or musty-smelling. Occasionally this is also accompanied by small flies that hover around the soil. See Fungus Gnats.
-
Leaves are excessively drooping, despite the soil feeling moist.
If you notice any of these symptoms, check and make sure your plant is draining efficiently and not standing in any excess water. Reduce watering frequency and allow the potting mix to dry out at least 50% before watering again. If the soil is excessively wet, we only then recommend repotting into fresh, well-draining potting soil.

Signs of Underwatering
- Limp, drooping leaves that perk up within a few hours after watering
- Dry, compacted soil pulling away from the edges of the pot
-
Crispy brown leaves, edges or tips
If you notice any of the symptoms on a regular basis, then reassess your watering schedule. You should check in with your plants a little more often than usual to provide them with more consistent moisture.
TOP TIP: Pot your Peace lily in clear plastic containers - this will help you see the roots as well as be able to gauge moisture levels in the soil.

Humidity & Temperature
As we now know Peace lilies are from warm tropical jungles, so they require relatively good humidity to stay looking pristine. This range is ideally between 40% and 60% with temperatures around 18 to 27°C.
Think of it this way: if you’re comfortable, it is likely your plant feels just the same. However, if you’re finding it a bit hot or cold, then there is a high likelihood your plant is feeling it as much as you are.
It is also important to consider placement carefully. Avoid placing your plant in the following situations:
- Near cool drafts: This includes open windows, windowsills, fans and aircons. Not only do the temperatures fluctuate in these situations, but they are likely to dry the air excessively, leaving you with a sad, crispy-tipped Peace lily.
- Near heating sources: The same can be said for spaces near heaters and fireplaces during cooler months. So be sure to place your plant at least 30cm or more away from any heating sources to avoid damage and a droopy, unhappy Peace lily.
Signs your Peace Lily Needs More Humidity
- Brown, crispy leaf tips: This is the clearest and most common sign your Peace lily may be suffering from a lack of humidity.
- Curling or puckering foliage: If your plant seems to be curling inwards or trying to reduce its surface area. This is an indication that your plant is trying to reduce moisture loss by reducing its surface area. So if you have checked in and noticed the lighting is right. Then it is very likely your plant is struggling with humidity issues.
- Wilted foliage: While this symptom is more often caused by watering issues, it can be a sign that your plant is struggling with humidity issues and may need them raised to help even out moisture loss through their leaves.

Tips to Increase Humidity
If you notice any of the symptoms above or know that your home is relatively dry due to location or other factors, here are a few things you can do to raise humidity in your home:
-
Group plants together: plants naturally release moisture during their daily functions. When grouped together this can raise the amount of moisture in the air around them.
-
Pebble trays: These are a cheap and easy way to raise humidity for your houseplants, Place a shallow tray or decorative plate of water with pebbles under the pot so the plant sits above the waterline; as water evaporates, it raises humidity.
-
Use a humidifier: especially helpful in colder months or dry climates to maintain consistent humidity.
-
Strategic Placement: Certain spaces in your home naturally higher in humidty, such as your bathroom or kitchen. These are excellent places to place plants that really like high humidity levels. However, make sure to consider the lighting conditions before selecting these spaces.
For more detailed tips on creating the perfect humidity environment for your plants, refer to our humidity guide.
Signs your Peace Lily Has Too Much Humidity
Fungal infections and mushy stems: This often presents itself with black patches and sometimes a yellow ring around the patch.
Pests: Certain pests, like mealybugs, cotton wool-like creatures, love warm, damp conditions and will happily munch on a stressed plant in high humidity.
Mouldy soil: Once again, like with fungal infections in the foliage, any mould found on the soil is a clear sign that humidity may be a little too high around the root system.
If any of these symptoms are present, it is a sign that you may need to address high humidity in your space. When it comes to fungal infections or mould, we suggest treating these as follows:
> Remove any highly affected foliage.
> Scrape off any mould and the top 2 cm of potting soil, and replace with fresh soil.
> Treat with a fungicide such as Copper Soap.
> With pests, treat accordingly see pest identification and treatment here.
Tips for Reducing Humidity
If you notice any of the symptoms above, it is likely that your watering regime may be a little too frequent or your humidity levels are very high. Here are a few tips to reduce future issues:
- Add more air circulation: This is the easiest and often the most effective way to treat humidity issues. Crack a window or add a gentle fan to your space that blows in a circular motion without hitting your Peace lilies leaves. This will bring in fresh oxygen and avoid the air being stagnant. Something fungal infections need to thrive.
- Relocate: Placing your plant in a space that is bright but a little more airy will help with reducing humidity issues. So, if you find your kitchen or bathroom is a little moist, relocate your plant to another living area.
- Use a dehumidifier: These are created to do the opposite of a humidifier and will draw out excess moisture from the air. This will create a drier, more airy space.

Potting Peace Lilies
When it comes to keeping your houseplants happy, especially your Peace lilies, the soil and pot you choose really matter, just as much as the watering and sunlight. A quality potting mix really makes a difference. It is important to ensure your plant has a well-draining soil rich in organic matter and creates good aeration. This supports the roots and allows them to access the oxygen they need to keep them healthy and avoid soggy soil, all of which helps your plant thrive.
We recommend choosing a quality potting soil, like our organic mix, and adding a little extra perlite and bark to create the ideal potting soil for your Peace lily.
Choosing the right pot for your Peace lily is equally important. Terracotta pots are great because they “breathe” and let excess moisture evaporate. Though not ideal in very hot climates as you may lose moisture far too quickly. Plastic pots hold moisture a bit longer, perfect for your Peace lily if you would like to reduce watering frequency, though drainage is of utmost importance. So make sure all the planters you select have drainage. Otherwise, keep your Peace lily in its plastic nursery pot, and use something pretty like a Ceramic planter as a cover pot.
Pot size matters too: pick a planter that is slightly bigger than the root ball. Too big, and the excess soil will hold too much water; too small, and the roots will get cramped, and your plant may not grow.

Know When to Repot Your Peace Lily
The first thing to understand is when to repot your Peace Lily. Many people rush to repot too soon, but it’s usually only necessary if the plant hasn’t been fed for a year and needs fresh nutrients. The best time to repot is in spring, when your Peace Lily naturally begins its growth phase and can recover more easily from the move.
Here are a few common signs your Peace lily needs repotting:
- The plant is three times the size of the planter and toppling over or bursting out of the pot.
- Roots are emerging from the top of the soil or out of the drainage holes.
- Water drains through too quickly or does not penetrate the potting soil due to compaction.
- Your plant has been in the same pot for over two years, so its leaves are often yellow.
-
Flowering frequency has reduced.
One of the biggest and most common mistakes people make when repotting their Peace lily is disturbing the roots. Their roots are sensitive little things, and rough handling can lead to something called 'transplant shock'.
This is evident when leaves start drooping after potting, even though the soil is moist. It can also cause the spathes to drop and die unexpectedly. It is best to avoid this where possible, as extra stress on your Peace lily can lead to slowed growth, a very unhappy plant and sometimes even death.
Try your best to avoid this by being as gentle as possible. Do not try to loosen a bundled up root system. Rather, lightly water a very root-bound plant and then just transplant it into its new container. Filling the base with a little soil, popping the plant in and then filling the side. Tapping the side to ensure gaps are filled. Press firmly into place and give another light water (but don’t drown it!). Hold off on fertilising during the first couple of weeks after transplanting to give the roots time to settle.
If a little shock does occur, do not panic!

How to Manage Transplant Shock in Peace Lilies
If your Peace lily does present some transplant shock after repotting, there are a few things you can do. Consistency here is key.
- Place in a warm indirect light position: Avoid any direct sunlight, or a spot that is too dark. Your Peace lily will need a little extra energy to recover.
- Make sure to re-pot in Spring: This gives your plant the warmth it needs to recover, as well as this is the time of year when your plant is in active growth mode. Helping your plant put energy into recovering faster.
- Keep the soil moist and humidity high: without enough moisture your plant can really struggle to move nutrients and growth hormone around. This will then slow recovery. Though, be mindful of overwatering and keeping the soil too wet.
- Avoid fertilising: Rather give your plant time to recover. Too much fertiliser can lead to extra stress. Your Plant will have enough stored nutrients in its older foliage, and in the new potting mix to recover.
-
Be Patient: It can take a couple of weeks to a few months sometimes for your plant to recover. This has a lot to do with how much damage was caused to the roots. Be sure to be consistent, check in regularly, and with a little time, your plant should be happy and healthy again.
Top Tip: If you live in Cape Town and want to have us Pot your Peace lily for you. Visit us at our Roodehek store. See our Repotting Service here.

When and How to Fertilise Your Peace Lily
Like with any houseplant living in a planter away from the natural elements. Peace lilies will need feeding. Luckily, unlike some plants in your home, their fertilising frequency is a little less demanding, as they are relatively light feeders.
You should fertilise your Peace lily from Spring through mid-autumn with a half dilution of a well-balanced, possibly organic fertiliser, once a month. Organic fertilisers are a little gentler on your plant root systems, as Peace lilies have very sensitive roots.
Check out our range of fertilisers here, as we stock a good supply of peace lily-friendly fertilisers, available in-store or online.
Signs Your Peace lily Needs Nutrients:
- Pale leaves: Plants need nitrogen to produce chlorophyll, the green colouring in leaves. This in turn is what they use to photosynthesise and produce energy. As they are not exposed to the outdoors where nitrogen is readily available, you will need to substitute it for them. If you have not fed your plant ever or in a long time, your plant can start to slow chlorophyll production and produce weak, pale foliage. Though once you have fed your plant, over time the colour should return.
- Slow or no growth: The same as with pale foliage. If your plant does not have enough nitrogen to perform its functions and create energy. Your plant will be unable to grow successfully.
- No flowers: Flowers are very expensive to produce and require a lot of energy to maintain. If your plant does not have enough nutrients to assist with producing energy, your plant is very unlikely to bloom.Therefore be sure to fertilise to keep your Peace Lily looking its best.

Signs of Overfertilisation:
-
Black leaf tips and margins: If you feed regularly and start to notice black leaf tips or margins, it is likely there is a buildupof salts in the soil. All fertilisers have a little; synthetics have a little more than organic. This can lead to your leaf tips drying out.
- White crusty layer on soil: This is a very clear sign of nutrient and salt build up in your potting soil from too much fertiliser.
- Wilting leaves and yellowing after feeding: This indicates fertiliser burn, where excess salts from overfeeding draw moisture out of the roots. The plant struggles to take up water, which leads to drooping and yellowing foliage shortly after fertilising.
-
Sudden plant collapse: When too much fertiliser is applied, the roots can become scorched and lose their ability to absorb nutrients or water, causing the entire plant to wilt or collapse seemingly overnight.
How to Fix Overfertilisation
Luckily, if you have been slightly heavy-handed with the fertiliser or feed a little too frequently, there is a way to adjust and fix this before it causes too much harm.
The best approach is to flush the soil with loads of water. It is best to use either a water with a low mineral content, such as a spring water, or one with no minerals, such as a distilled water. Flushing means to water your plant at least three or four times to rinse out any excess salt build-up. Then allow the soil to drain thoroughly.
It will then be important to avoid fertilising for a month to help the plant settle from the shock of excess salts in the soil.
If you notice that salt still builds up on the potting soil, causing a crust. Then it is best to rather repot your Peace lily. However, this is often in very rare cases.

Pruning & Grooming your Peace lily
Pruning and grooming is a valuable step when taking care of any of your houseplants. With your Peace lily it is a great way to encourage more blooms, and keep it looking fresh and healthy. This step is also a fantastic way to catch pests in the act before they overtake your Peace lily.
It is advised to remove any dead or dying flowers, and yellowing foliage. This helps neaten up the plants appearance. While wiping down the foliage with a soft, lightly wet cloth keeps the foliage free of dust and pests. You can also add a few drops of pesticide into the water you will be using to dampen your cloth. This can act as a nice preventative and leaf shine as most pesticides are oil based. Just make sure to wear gloves when using this approach.
When pruning, be mindful to not over-prune, as this can stress your plant and leave you with a very bare-looking Peace lily.
Overall, grooming your plant is a great way to let it know your care for it.

Tips for Propagating Peace Lilies
Peace lilies are fabulously easy to propagate and a great way to spread the love to friends and family. We find that the best and most effective way to do this is via division. Division works best on mature, healthy plants that have developed multiple leaf clumps. While it is possible to propagate smaller divisions via water for a short period, we find this has a relatively low success rate compared to soil propagation.
How to Propagate Your Peace Lily by Division
1. Prepare your plant and tools
Timing is important! The ideal time to divide your plant is during spring and early summer, when your plant is in its active growing phase.
You’ll need:
-
A sterilised, sharp knife or garden shears
- Fresh, well-draining potting soil
-
New planters with good drainage holes
-
Gloves (Peace Lilies contain calcium oxalate, which can irritate skin)
Top Tip: Give your plant a drink the day before dividing. A well-hydrated root system makes the process smoother and helps reduce transplant shock.
2. Separate the Root ball
Remove your plant from its current planter, and gently remove as much soil as possible to expose the roots. Look for where the plant naturally clumps, also known as the crowns, at the base. It of these crowns should have a few leaves and a root system. They are generally the babies of the mother plant.
Gently tease these clumps apart, and they should come away easily. If the root system is quite bound together, use your sterilised knife to cut through the roots, but be sure to do as little cutting as possible to avoid shock.
3. Pot up your New Divisions
As with repotting, choose pots that are slightly bigger than your division's root system to avoid overwatering. Fill the planter with a little soil and pop your crown in as high as it was in the original pot. Fill with excess soil around the edges, tapping gently to fill in any gaps. Once filled, press in gently to ensure your new division is secure.
Water gently to settle the soil, and allow it to drain any excess moisture completely.
Place it in a warm, humid, and bright indirect position and check in regularly to monitor progress. Making sure to keep the soil evenly moist while roots establish. Once you notice new growth, you can then care for the plant according to your normal routine.
Note: A little wilting and drooping is normal at first. Care for your plant as usual and in time it should recover as it establishes.

How to Deal with Pests on Your Peace Lily
Peace lilies are pretty resilient plants and will often give you few problems if conditions are just right. Though when under stress they become susceptible to pests as their immune systems have weakened. So lets look into a few signs that your Peace lily may be dealing with some unwanted homemakers.
Signs There May be Pests on Your Peace Lily:
-
Sticky residue or honeydew: This is usually a sticky, syrupy-looking substance on foliage. It usually forms in droplets and is a good indicator that you may have some sap-sucking insects living under the leaves or on your steps. Keep an eye out for ants. They tend to farm Mealybugs, Scale and Aphids for this sweet substance.
-
Webbing: Look for any webbing, particularly underneath the leaves or on the stems. It is likely you have Spider mites. If you spy closely on the web, you may notice hundreds of tiny insects. Spider mite infestations are a clear sign your air is also very hot and dry, and you may also notice signs of low humidity like crispy leaves.
-
White cottony clumps: If you note any white clumps on your leaf joints, under the leaves and along the stems, your plant has an unwanted hitcher known as a Mealybug. The presence of these critters is an indication of a warm, wet environment. So check in on humidity levels and any other environmental stressors.
-
Brown bumps or “shells”: These are the sap suckers known as Scale. They are more often than not found on plants struggling in hot, dry conditions, similar to Spider mite. If you notice these, it is important to check in on your watering as well as how hot and dry the air is. From there you can treat these pests with a pesticide.
-
Yellowing, pale, or mottled leaves: Any discolouration on your Peace lilies leaves, especially if it looks speckled and like it is fading in odd spots, is a sign of pests. This is caused by damage they leave behind when sucking out nutrients from your plants.
-
Leaf curling, distortion, or stunted growth: These symptoms usually present themselves after long-term pest infestations and are a sign that intervention needs to take place or you are likely to lose your Peace lily.
If you see any of these, it’s time to inspect more closely and act. Check out our pest care guides or read Identification and Treatment of common Houseplants Pests.

Preventive Measures & Best Practices
As with anything, prevention is always better than cure. When it comes to making sure your peace lily is happy, healthy and pest-free, we always recommend a few simple tips. The better you manage the environment your Peace lily is kept in, the easier it will be to care for it. Below are a few simple things you can do to keep your Peace lily or other houseplants thriving.
-
Quarantine new plants for a week or two before placing them near your other plants: This is generally good practice, as sometimes pests can catch a ride from the nursery without being spotted.
-
Keep leaves clean: wiping down your Peace lilies leaves with a lukewarm, soft damp cloth can both keep pests at bay as well as help you spot them easier. This also helps keep your plant dust-free, allowing it to photosynthesise optimally.
-
Maintain excellent air circulation and average humidity: If you keep your Peace lily in a space with great airflow and relatively good humidity, your plant should be nice and comfortable. The less stress your plants have, the less prone they are to pests.
-
Avoid overwatering or waterlogging, which stresses plants and makes them more vulnerable. Check in on our water tips above for best results.
-
Inspect your plants regularly (front and back of leaves) so you catch pests early. This is where wiping down the leaves as part of your care routine will shine.
- When Pesticide is needed, we always suggest using a gentle, organic treatment first. Things like Pyrol or Bioneem, which are organic based pesticides are gentle and less likely to damage your leaves. See more on Pesticides here.

The Art of Placement: Styling your Peace Lily
Moments of Pause
Take a moment to consider the spaces in your home or office where you pause, even briefly. Spaces like the landing halfway up a set of stairs, at your entry table near a doorway, or even your side tables next to your bed. These are perfect positions to add a Peace lily; this approach fills lost, often overlooked spaces with presence, structure, and beauty.

Sensory layering
Peace lilies are fabulously functional plants. Their clean lines, crisp foliage and beautiful blooms act like visual cues for calm while improving air quality. They do well in slightly humid spaces — like near a bathroom window or beside the stove, on a bright shelf. If a room feels dry, your peace lily will quietly help — releasing moisture into the air and adding a soft sense of life to the space. Place them where you naturally feel you need softness — they’ll do more than just look pretty.

Light and Shadow Play
Peace Lilies do well in spaces that other plants often dont, generally soft indirect light to darker corners in the home or office. Use Peace lilies to liven lower lit spaces, like hallways, spaces under stairs, or rooms with limited windows. Their glossy leaves will catch and reflect every bit of light available, adding depth and movement to the space.
For a subtle design trick, place your Peace Lily opposite a light source and let the leaves cast soft shadows across a wall. It creates a dynamic, ever-changing backdrop, a natural version of art in motion.
The Planter as a Design Tool
When it comes to styling Peace lilies, adding a little texture in other forms is a fantastic way to create visual impact. So before considering what to group your Peace lily with, let’s consider it as a standalone statement piece. Like with anything, the way you dress it up will connect it with your style.

Baskets bring warmth and weight.
A woven Palm-leaf basket or Cotton cord cover pot softens hard edges and brings warmth to modern spaces. Adding this kind of natural texture ties your plant beautifully into your décor, creating a relaxed, organic feel.
For a touch of personality or to tie baskets to your decor style, consider patterned or coloured weaves, our Zuzu Baskets are great for this. They will draw in the eye without overwhelming the natural look.
Baskets work especially well in places designed for pause — your entryway table, a stairway landing, or any spot where you want calm without clutter. Keep your Peace Lily in its Plastic nursery pot with a drip tray inside so it’s easy to lift out for watering. The tray will catch any excess moisture, protecting the base of your basket from damage.

Ceramic offers intention
Ceramic planters are an easy way to add intention to your design choices. They come in a variety of colours and shapes, from modern sleek designs to more traditional colourful options. There is a ceramic planter for every decor choice.
If you are looking for something modern with clean lines, consider planters such as our Flo Planter in matte Terracotta or White. Otherwise, a Shing Plinth Planter adds that little extra height and stylistic touch, making your Peace lily feel like a design statement with intention.
In shadowy corners or against darker walls, a light or boldly coloured Ceramic planter instantly becomes sculptural. It will reflect the light in the room, adding depth and presence to the space. Choose a pot with drainage holes and a saucer, or use the ceramic as a decorative slipcover, just like you would with a basket.
Self-watering planters for the busy
If your peace lily lives in a high-traffic office or a spot you don't pass daily, a self-watering planter may be the perfect option for you. They are designed to make life that much easier by giving you an indication of when a top-up is required, without you needing to do the grunt work of checking. The reservoir keeps your peace lily's roots moist, which they love. You can either find simple decorative options or use a Styler liner, especially for big plants. Stylers are like self-watering nursery pots, giving you the opportunity to dress up your peace lily just as you wish.

Adding a little height
Peace lilies naturally grow in a compact, bushy form that keeps them close to the ground – beautiful, but easy to overlook in a room full of taller elements. When you elevate them on a plant stand like the Orion, they command attention.
The vertical lift draws the eye upward and creates visual layers in your space and transforms your Peace lily into a sculptural element. Plus, a slender plant stand takes up far less floor space than a side table or bookshelf, which is ideal for those tight corners or spots you would like to keep clutter-free but visually appealing.
Stands also make a fabulous addition to plant groupings. Using varied heights with stand options like our Wooden or Metal stands, for floor or tabletop displays can add a dynamic feel to a plant collection. Pop your Peace Lily on a tabletop stand to make it the centre of attention and build around it. See below, using a Peace Lily as negative space.
Create a Humidity Microclimate
Stop scattering plants randomly and start building little ecosystems instead. Thoughtful groupings can do far more than just look beautiful; they create balance.
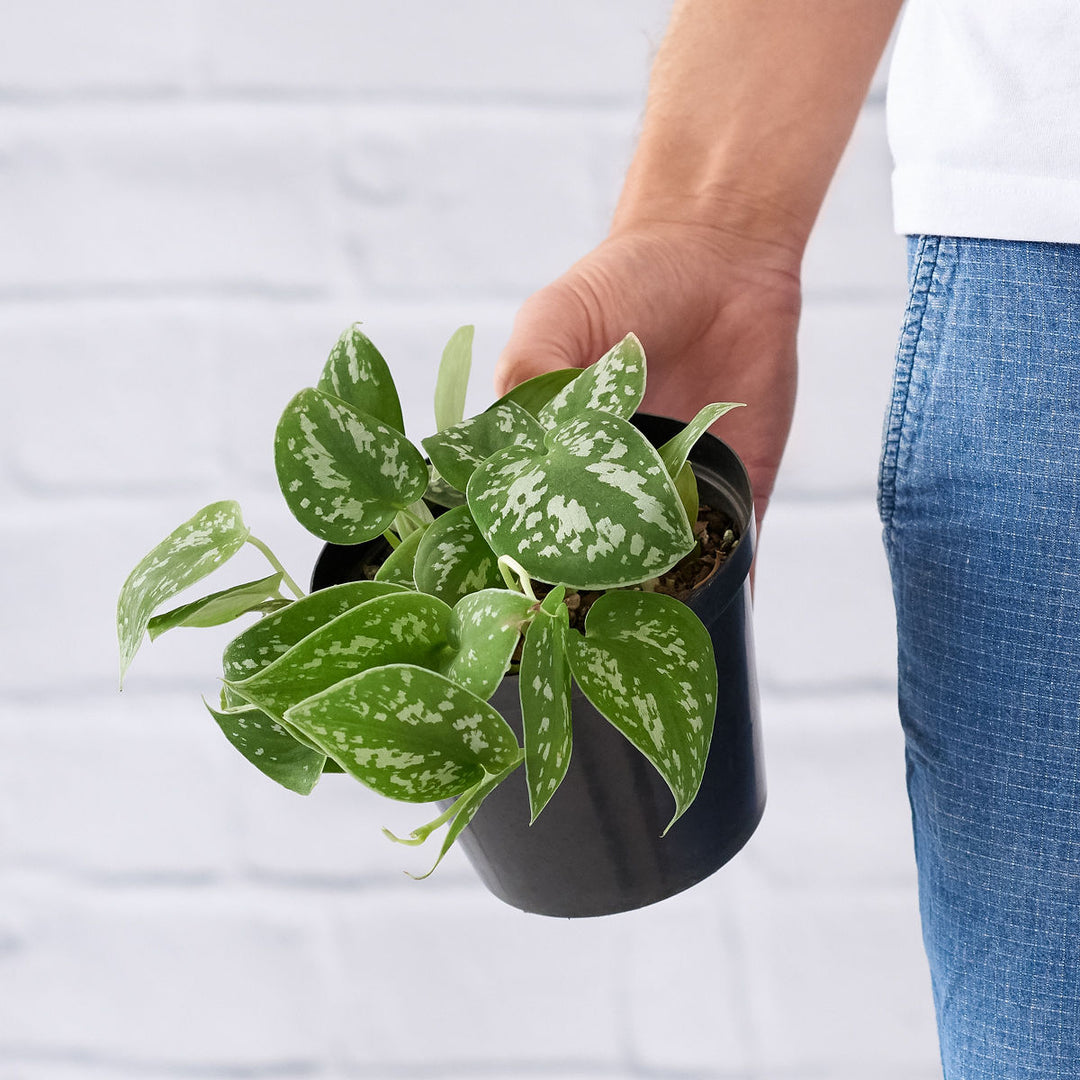
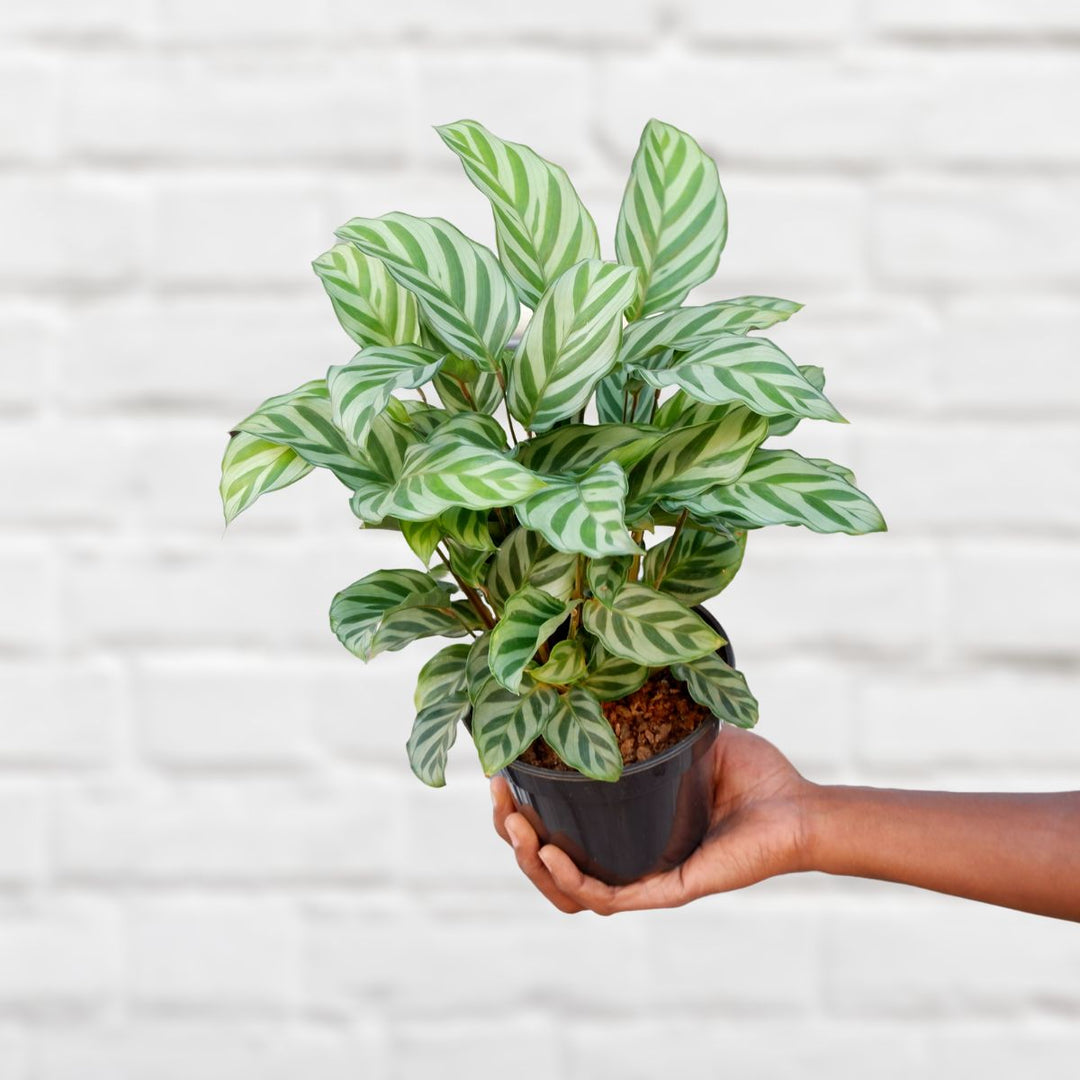
Try placing high-transpiration plants together, like your Peace lily with Philodendron, Ferns, or Calathea. As they work together and release moisture, they share it through the air, naturally raising humidity and creating a more comfortable microclimate. It’s a quiet exchange that keeps every plant happier — and your skin might even thank you too.
Grouping plants this way also makes your space feel fuller and creates that tropical charm most people desire. So play with leaf shapes and sizes to create a little piece of the jungle in your home.

Textural Storytelling
Just like with groupings for humidity, consider grouping plants for textural interest. Using plants that have different leaf textures and gloss will create a visually tactile narrative for the eye, drawing it in.
Consider pairing the glossy leaves of your Peace lily with delicate ferns such as the Maidenhair, which will dance in a light breeze, creating movement. Adding plants like African violets, Emerald Ripple Peperomia, or Moon Valley Pilea will create visual texture, adding a different kind of light play and making the ensemble stand out.
Negative Space
Peace lilies are fabulous filler plants with their plain green leaves and occasional white bloom.
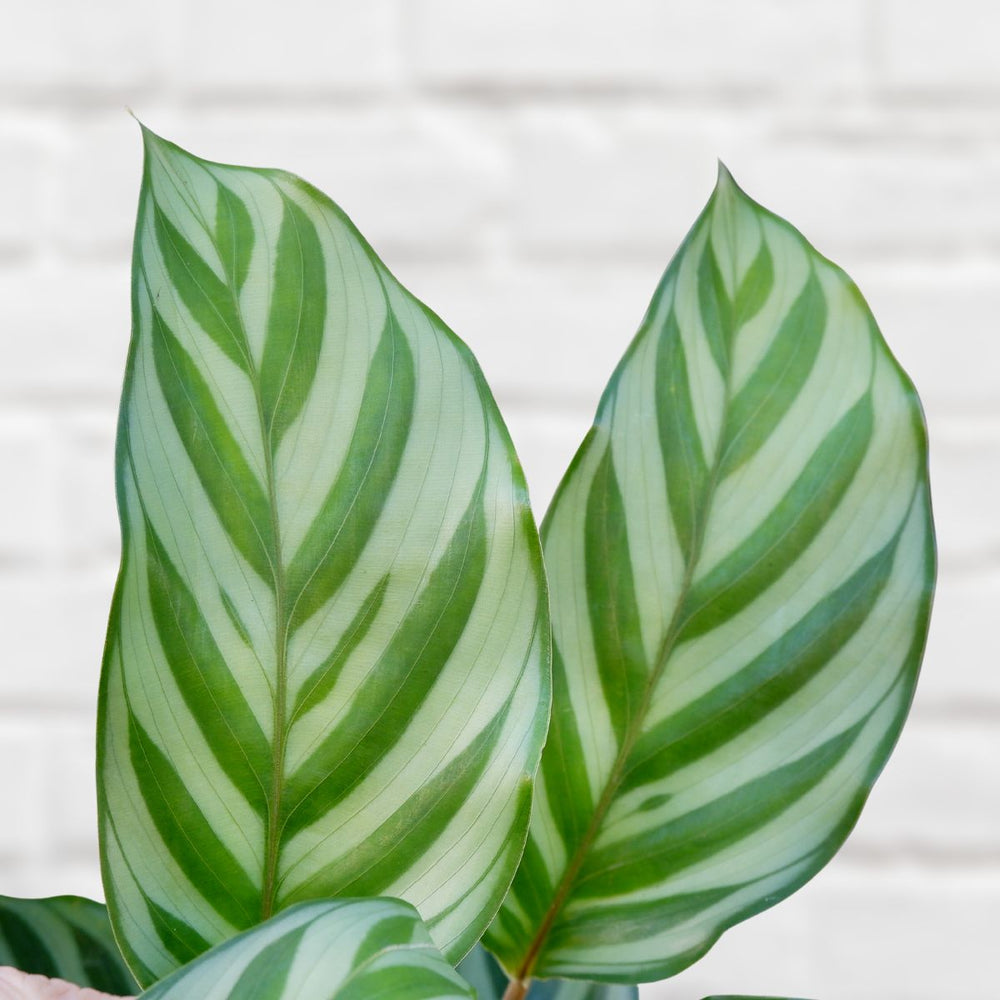
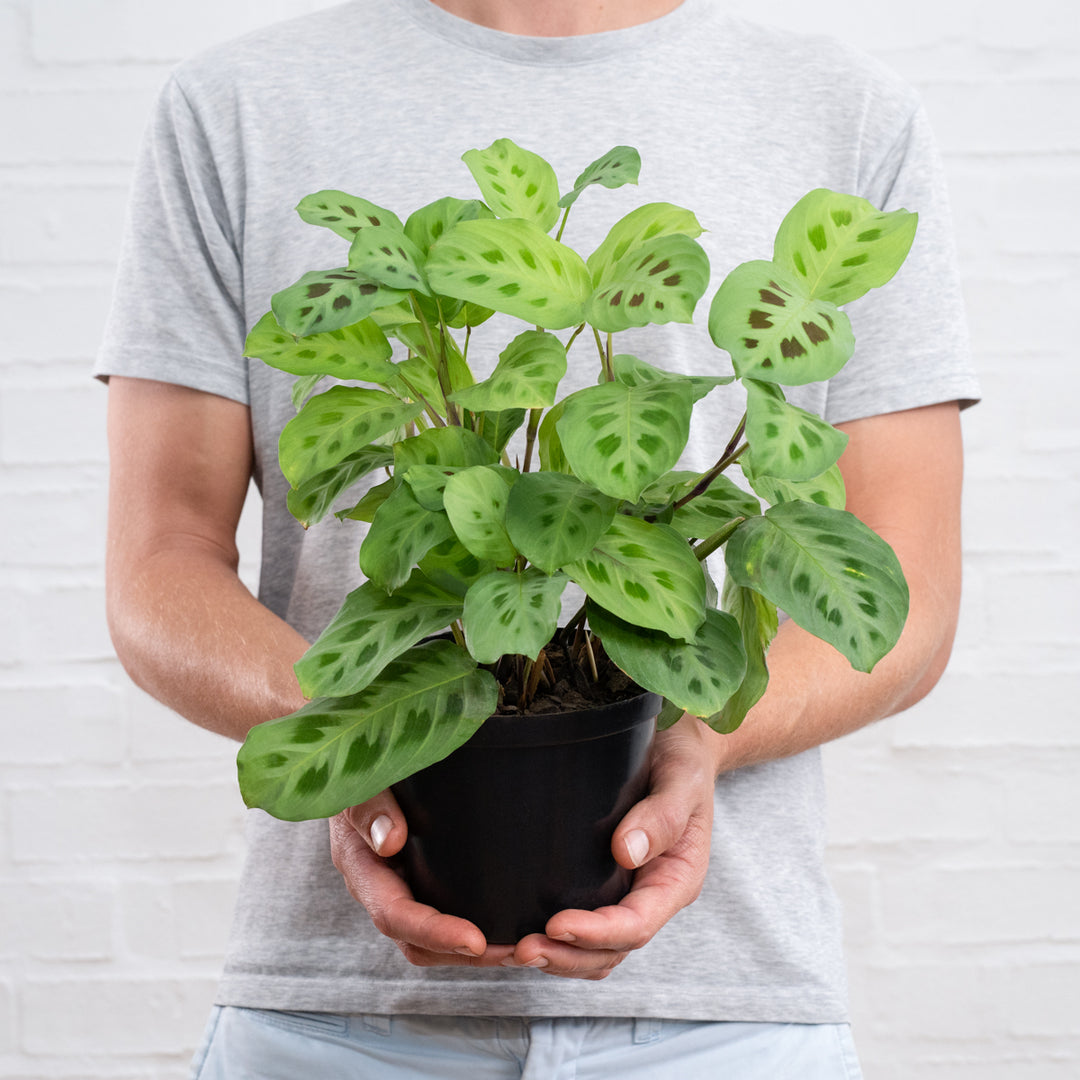
Its green-and-white simplicity acts like a negative space in a painting, great for layering among colourful plants, giving your eye a place to land among the bold colours. Consider pairing it with high-drama plants like Prayer Plants, brightly coloured Calatheas, Silvery or Spotted Begonias, and boldly variegated foliage, and watch how the Peace lily will anchor the whole composition.

The beauty of Peace lilies lies in their forgiving nature; they tell you when they’re thirsty and bloom continuously when they’re content. But the real secret to a thriving peace lily is simply consistency: keep the soil gently moist, check in regularly, and address any issues while they're still small. This simple care routine will keep your plant flourishing in your home for years, even decades.
Their simple care and beauty are testament to why peace lilies have never gone out of style. Whether you're livening up a dark corner with your plant, elevating it as a striking focal point, or layering it into a jungle of other plants, your Peace lily will adapt beautifully.
We hope this guide has given you fresh ideas for styling and simple tips for caring for your peace lily - or maybe inspired you to finally bring one home. And if you have your own peace lily wisdom to share, we'd genuinely love to hear it. After all, the best plant advice often comes from years of trial, error, and happy accidents.


Very helpful information in caring for Peace lily. Thanks 😊
Leave a comment