
Master the Art of Kokedama: Your Complete Guide to Crafting Moss Balls

We thought we’d let you in on our secret and guide you in the wonderful and creative art of crafting the ever-popular Mossballs. Mossballs, commonly known as Kokedama in Japanese, are a traditional method of growing and displaying plants, both indoors and outdoors plant displays, and are commonly used for creating stylish and often unique hanging gardens.
In this guide, we will take you through the step-by-step process of building a moss ball, give you tips for suitable plants, and set you up for the perfect care to keep them looking their best. So grab your moss, get ready to play in the dirt, and let's embark on this moss-filled adventure together!
What Plants Are Suitable For Mossballs?
When it comes to choosing plants for your moss balls, pretty much anything will work. We like to think of Moss balls as a great eco-friendly way of getting your plants out of those plastic nursery pots they come in without the added cost of a planter.
Tropical foliage plants are usually the best choice, as they like it moist, however, that doesn't mean you shouldn't try succulent plants. Just be mindful about your choices. The plant world is your oyster.
Below is a list of suitable houseplants we think are ideal in Moss balls.
Leafy Green Plants that Look Great in Moss Balls

Trailing options for creating a curtain effect:
-
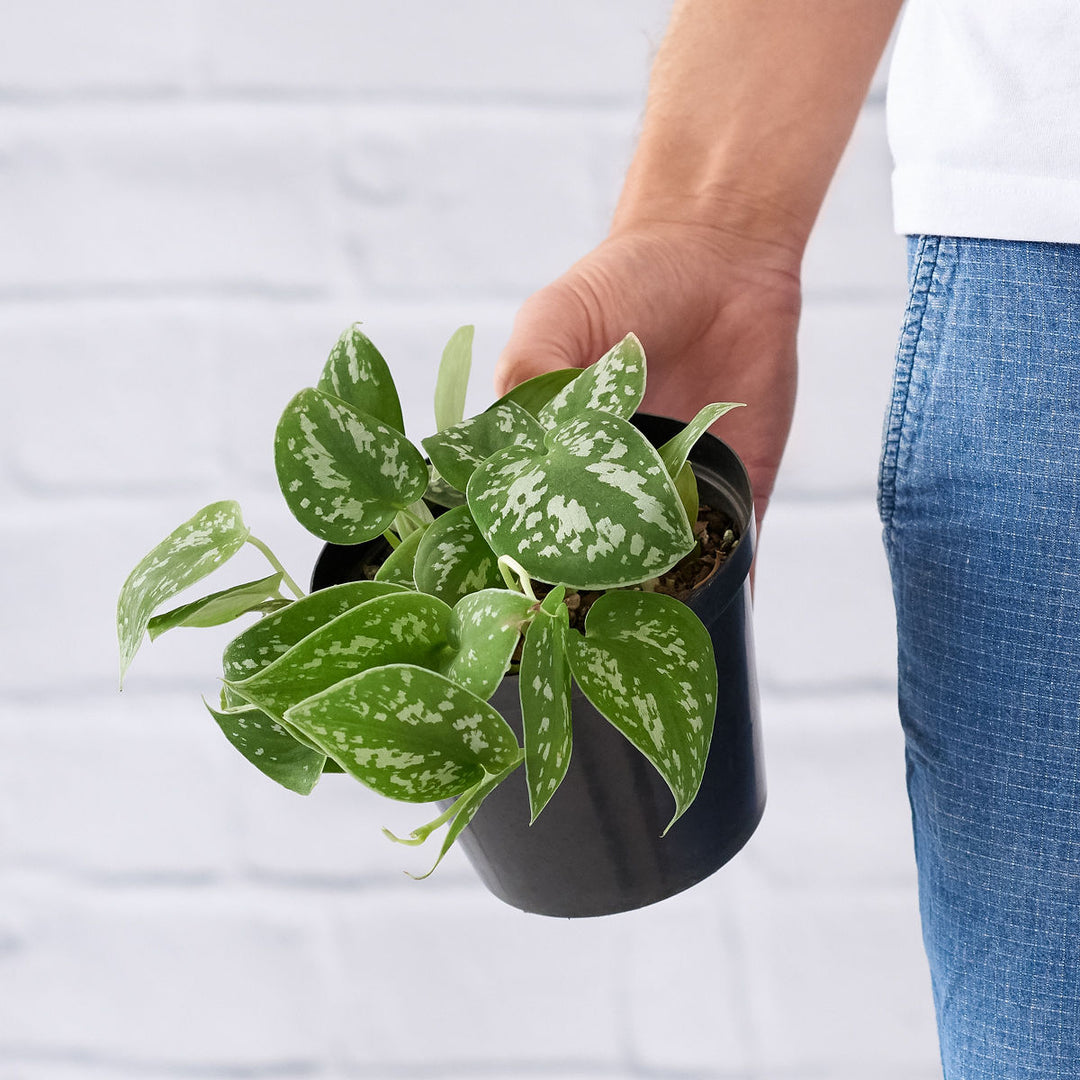
Pothos especially the Pictus, Silver Splash, Jade, or Marble Queen are exceptional choices - although we find that the Golden Pothos can be a little finicky in a Mossball configuration.
-
Philodendrons: Any will work, but the Heartleaf and Brasil are staples. However, for something a little unique, consider a Florida Beauty or Oakleaf variety; they are especially pretty.
-
Hoya: All varieties are suitable - find all Hoyas here.
-
Ferns: They love the moisture that the mossball provides. Consider a pop of colour with the Golden Glow Fern, otherwise something delicate like the Maiden Hair, or a great hardy choice is the Kangaroo Fern.
-
Lipstick Vine: A perfect easy care plant that will add stunning crimson red flowers when in season - Lipstick Vine.
-
You can find more trailing plants here.

Upright Foliage Plants for Mossballs - Create Height and Interest
- Peace Lilies with their large, deep green leaves - plus, they’ll thrive in the Moisture!
- Chinese Evergreens - especially the colourful varieties such as the King of Siam
- Homalomena for a stylish green option.
- Orchids - ideally use Sphagnum Moss instead of soil
- Anthuriums will add a pop of colour with their long lasting flowers.
- For more Upright plants, check here.

Succulent Plants Suitable for Moss Balls
Most succulents will happily work as long as you water less, and keep them on the dryer side. However, to be on the safe side, we recommend mainly sticking to the “Jungle” Cacti varieties - succulent epiphytes that are used to more humid conditions.
- Jungle Cacti: such as Hurricane Cactus, Rhipsalis, Pfeiffera Cactus, Christmas Cactus are naturally suited to humid conditions.
- Dainty Crassula: if happy, they’ll bloom tiny white star-like flowers and do well on a Patio. Great choice for a long cascading effect.
- Watch Chain Crassula for something unusual.
- Aloes: for a striking silhouette.
- Spekboom: Easy care, great for a sunny spot and can be pruned into a fun style.
Not keen on making your own Moss ball? Check out our available options here.
Materials Needed to Make Mossballs

Here is a list of items you’ll need before starting your Moss ball, be sure to have them set out and ready to go before starting.
- Your Chosen Plant
- Potting Soil Mix - any soil type that is easy to mould and will hold its shape. We often recommend a Peat-Based option such as our Premium Potting Mix or Palm Peat with a mix of our organic potting soil (ratio of 1:1)
- Sphagnum moss or green decorative moss.
- One Reel of Twine or Waxed String. We prefer wax-covered twine as its waterproof qualities ensure that it lasts longer.
- Sharp Scissors
- Water
- Bamboo stick or Chop sticks (for the trailing plants) - this is an implement used for typing up the foliage into a "ponytail", whilst making the ball.
- Containers for Moss and Potting Soil.
- Something to cover your workstation, such as a potting mat or piece of plastic, will make clean-up easy.
Step-by-Step Guide to Making a Moss Ball
Here we will guide you through the step-by-step process of shaping and preparing your lovely new Mossball.
1. Prepare the Plant: Gently remove the plant from its pot and shake off excess loose soil. Trim roots if necessary, and use a bamboo stick to tie up trailing plants to make it easier to shape the ball without the tendrils getting in the way. You may need to wet the soil first, to bind it, before removing it from the pot. We usually soak the soil of our plants before removing the planter!
TOP TIP: If mossing any Ficus or Peace Lilies, be careful not to trim the roots, this can cause the plant to go into shock. Generally speaking - the less you can disturb the roots - the better!

2. Create a Soil Mixture: Mix potting soil with water until mouldable. If you clump it in your hand and it stays together, you're good to go, though if it is dripping - drain out excess water.

3. Form the Moss Ball: Wrap moist soil around plant roots to form a ball shape. Be sure to add enough to cover all the roots and make the ball just big enough so the plant looks balanced.

4. Secure with String: To effectively secure the moulded soil in place, use enough string to hold it firmly without completely engulfing it, ensuring a delicate balance. Crisscrossing the string while tightly wrapping it around the moss ball provides optimal coverage and stability. Do not worry if the ball appears slightly misshapen during this step; adjustments can be made during the mossing process. The key is to strike the right balance—enough string to secure everything together but not so much that the soil is obscured or too little that the ball falls apart prematurely.

5. Mossing: Moisten the moss just enough to have it lightly damp, and press it out into a small circle to match the base size of your ball. Place your Mossball on top of this and cover the ball in Moss. Secure this with a String to hold the Moss in Place. Be sure to lift your Mossball off the counter with its base of moss, and secure that in place with string.

6. Final Moulding: Shape your ball into the most rounded shape you can, and check that all the string is tightly secured and tied off. Be mindful that the ball will be flat on the surface that you placed it on, so you may want to “round the flat” afterwards.

7. Trim Excess: Neatly trim any excess moss sticking out or string.
8. Add a Hanger: If you're planning to hang you mossball, add an extra loose loop of string to your moss ball, checking that you are creating the loop to hang your moss ball in the direction you want the plant to be displayed.

You can create a hanger using a length of string to your specification and attach this to a Carbenier, which will be attached to your hanging loop.

And voila! You have made your first Moss ball. Do not worry if it is not perfect. Over time and with practice, you will be making them like a pro.
General Care Guide for Moss Balls
When it comes to looking after a Mossball, it is more about the plant than the Mossball itself. However, the difference will be in the way you water it. Here are 4 short steps for keeping your Moss balled plant happy and healthy.
- Lighting: Place moss balls in an appropriate location for the specific plant type. Most tropical plants want a bright indirect light position, while certain succulent plants want it sunny. Use our Plant Care Guide List to help you find specific plant care.
- Watering: Use a bucket or sink large enough to submerge the ball of your plant in water. It should cover at least all or ¾ of the way up the ball. Make sure the water is clean to avoid debris sitting all over the Mossball. If your plant is outside, you can potentially hose it down, but this can be an extreme waste of water. Soak the ball in your container of choice for about 20 - 30 minutes to ensure proper saturation, however, if the Moss ball has become extremely dry, an hour should be good. You can also add a few drops of liquid fertiliser at this stage to make sure your plant's nutritional needs are being met.
- Rotation: For a full, lush-looking plant, rotate the moss balls periodically for even growth and light exposure.
- Pruning: During your routine care, trim back any long, wayward stems of training plants and remove any dead or yellowing foliage for a healthier-looking houseplant.
- Repotting: If the plant outgrows its moss ball, carefully remove the old moss ball and make a larger one, or re-pot back into a planter with good drainage of your choice.

4 Ways to Style a Moss ball
There are numerous effective ways to display moss balls, allowing you to create one-of-a-kind and eye-catching arrangements. Here are four ways to attractively display your Moss ball, whether through a hanging installation or something more unusual.
1. Hanging
This is the most traditional way to present your Moss balls. However, you can get really creative with this by hanging your plants at different heights to create a dynamic display. Have a look at our Mossball Collection for an overview of the hanging application.

A different and stylish way to display your moss balls is as part of a tabletop arrangement. You can then display them on beautiful or decorative plates, such as antiques or tiles. For a dynamic display, use a variety of mossball sizes and plants with different colours, textures, and leaf shapes.

3. Mount them on Rock or Wood
This is an excellent way to bring Mother Nature's magnificent art indoors, giving your moss ball a less artificial appearance. Mounting them on large, unique pieces of wood, such as driftwood you may have found on a holiday excursion or a beautiful rock with gorgeous patterns in them, will create a unique and stylish look.
 4. Display them on Plinths or Stands
You can sometimes find Plinths designed specifically to hold Moss balls, giving them height and allowing you to create a stylish display. However, finding a stand and placing a tray or plate to hold the moss ball can allow you to create floor-standing displays with your moss balls, whether in a dull corner or a narrow space where large plants are unable to stand.

With this guide, you will be ready to start crafting moss balls with confidence and creativity. Whether you are a beginner or a seasoned plant enthusiast, Kokedama is a fun and rewarding way to incorporate nature into your home. So gather your materials, let your imagination run wild, and enjoy the process of creating your little mossy masterpieces!


Leave a comment